Pagina's

Posts tonen met het label kaarten maken / card making. Alle posts tonen

woensdag 27 februari 2019

kaart met foil techniek

Vandaag ga ik deze leuke foil kaart met jullie maken.
Ik heb de volgende materialen gebruikt:
 
- 470.802.072 Grunge 1 stencil
- alleslijm
- een vinger sponsje
- minc machine of laminator
- foil in de kleur naar keuze
 
 
Today I will be making this fun foil card with you.
I've used the following materials:
- 470.802.072 Grunge 1 stencil
- all purpose glue
- a finger dauber
- minc machine or laminator
- foil in any color you like
 
 
Om te beginnen plak ik mijn cardstock vast, 
zodat het niet kan verschuiven op mijn werkblad.  
Vervolgens plak ik de stencil met washi tape vast.
Ik heb de alleslijm op mijn craft sheet gedaan, 
zodat dit achteraf makkelijk af te vegen is.
Met het vingersponsje breng ik de lijm over de stencil aan,
 hoeft niet overal perfect te zijn, 
zo krijg je een beetje distressed effect.
 
 
To start I have taped my cardstock to my work surface, so it can't shift around.
Next I taped the stencil in place with some washi tape
I have put some glue on my craft sheet,
so it can be easily cleaned when I'm done.
With the finger dauber I've added the glue over the stencil,
it doesn't have to be perfect,
that way you get a little distressed look
 
 
Ik heb een minuutje de lijm laten drogen, 
en vervolgens heb ik er een laagje folie over gelegd.  
Dit heb ik door mijn minc apparaat gehaald 
(moest je geen minc hebben,
 kun je dit perfect met een gewone laminator doen, 
dan neem je een A4 blad, die vouw je in de helft, 
en daartussen leg je het cardstock met folie)
 
 
I let the glue dry for about a minute,
then you put foil over your cardstock,
and run it through your minc machine
(if you don't have a minc machine, 
you can do the same thing with a normal laminator,
just take a sheet of paper, fold it in half
with your cardstock and foil in the middle)


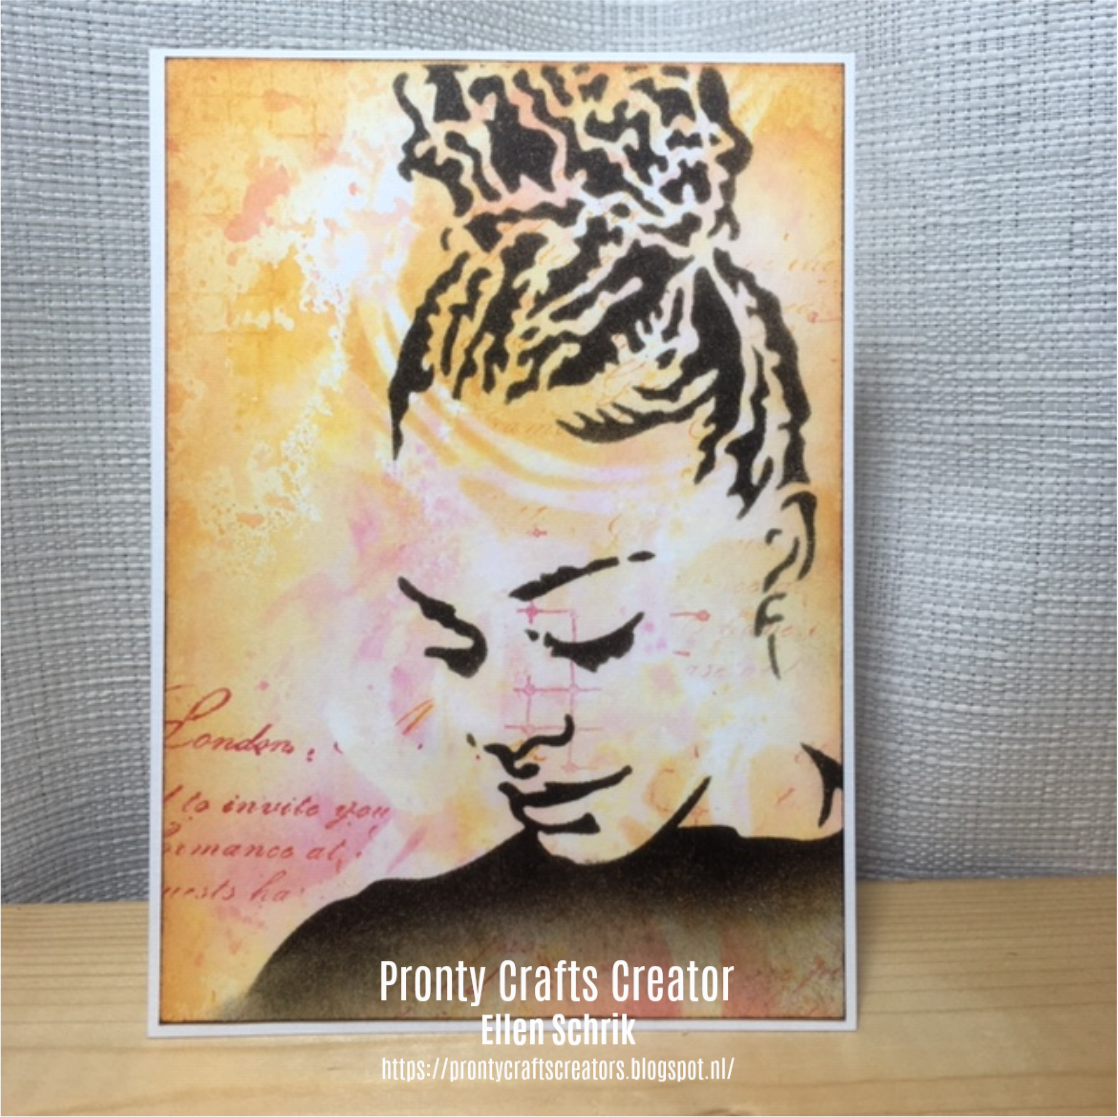
Hier zie je het leuke resultaat van de folie op de lijm
 
 
Here you can see the result of the foiling on the glue
Ik stempel een leuke tekst erbij,
 meer heeft dit kaartje niet nodig vind ik.
 
Vinden jullie het leuk om foil toe te passen op jullie projecten?
Laat het ons dan zeker zien op onze Facebook groep.
 
Ik wens iedereen een fijne dag, en tot de volgende keer
 
 
I've stamped a nice sentiment
I don't think this card needs anything more
Do you like adding foil to your projects?
Please make sure to show it on our Facebook group.
Have a nice day everyone, en see you next time


zondag 27 januari 2019

Valentijnskaartje

Hallo iedereen,
vandaag ga ik aan de slag om een valentijnskaart te maken.

Hello everyone,
Today I will be making a valentines day card

Hiervoor moest ik wel de geweldig leuke stencil
 van Julia Woning met de lippen (470.765.004) gebruiken.
Ik had een iets dikker papier genomen 
om het blenden vlotter te laten gaan,
vervolgens heb ik het stencil vastgeplakt aan mijn werkblad.  
En deze keer heb ik niet met een dauber gewerkt, 
maar gewoon met een droge, zachte verfborstel,
hierdoor krijg je een zachter resultaat van het blenden, 
ik moet zeggen, 
ik vind het effect enorm geslaagd.


I just had to use the amazing stencil by Julia Woning with the lips (470.765.004).
I used a slightly thicker cardstock this time
to make the blending a bit easier.
I've taped the stencil on my work surface.
This time, I didn't use a dauber, but instead
a normal, dry & soft paint brush,
you'll get a really subtle look with blending,
and I must say,
I really really like this effect.

Hier het resultaat van het blenden, 
ik heb 2 kleuren van de Distress Oxides gebruikt, 
ik vind deze inkten enorm geschikt voor het blenden,
 sommige stukjes zijn daardoor iets donkerder geworden


Here you see the result of the blending,
I've used 2 colours of ink Distress Oxides, 
I really like the inks for blending
some areas are a bit darker because of that.

Ik heb een hart stans gebruikt en vervolgens vastgelijmd.

I've used a heart die
which I glued to the cardstock

Vervolgens nog een tekstje 3 keer uitgestansd 
en op elkaar gelijmd voor een beetje dimensie

I've cut out the word 3 times, 
and glued it together for a bit of dimension

Tot slot, nog een extra laagje onder de kaart, en op een kaartbasis gedaan.
Ik vind het een heel leuk kaartje geworden.
Het is niet te hevig, 
ik hou van de iets simpelere kaarten

Finally, I've added an extra layer of cardstock
and glued everything on a side folded card.
I really like how this card turned out.
It's not too busy,
I love the simplicity of a handmade card


Dit was mijn blogpost voor deze maand, 
hopelijk zijn jullie weer geïnspireerd geraakt om 
zelf aan de slag te gaan met de producten van Pronty Crafts.
Laat zeker jullie creaties zien in onze Facebook groep.
vind het super om iedereen zijn creaties te bekijken
Fijne dag iedereen 


This was my blogpost for this month,
hopefully you all got inspired to create some 
beautiful things on your own, 
with the product of Pronty Crafts
Be sure to upload your pictures in our Facebook group.
Love to see all your work
Have a nice day

maandag 14 januari 2019

Two cards, one background

Hallo allemaal,

Vandaag laat ik jullie twee kaarten zien, die ik maakte uit één achtergrond. De Pronty producten die ik gebruikt heb zijn:
A4 stencil Grunge circles by Julia Woning 470.765.005
15 x 15 stencil Up do 470.801.048
-
Hello and welcome

Today I would like to show you two cards I made from one background. These are the Pronty products I used:
A4 stencil Grunge circles by Julia Woning 470.765.005
15 x 15 stencil Up Do 470.801.048


Daar gaan we:
Ik depte distress inkt op het stencil en spoot er water op.
-
Here we go:
I pressed distress inkpads onto the stencil and spritzed with water.


Ik legde een vel aquarelpapier op het stencil en drukte het aan.
-
I put a watercoour paper on top and pressed.

Op een tweede vel legde ik het gebruikte stencil om nog een afdruk te maken. Het werd erg licht, dus legde ik het vel in de inkt op die nog op mijn craftsheet lag. Wow, die was mooi!
-
On a second sheet I put the stencil again to make an impression of the circles. It didn't work out that well, so I pushed the sheet into the ink that was left on my craft sheet. Wow, what a nice surprise!


Ik besloot met het tweede vel verder te gaan. Het (inmiddels schone) stencil legde ik op het gedroogde vel en stempelde tekst door het stencil. Daarna sponsde ik met dezelfde kleuren, met het stencil nog steeds op het vel.
-
I decided to work on the second sheet. I put the (now clean and dry) stencil on the sheet and stamped text through the stencil. After that I sponged with the same colours, with the stencil still in place. 


Ik sneed twee kaarten uit dit A5-vel en bewerkte ze op verschillende manieren.
Op de eerste stencilde ik met Archival Potting Soil de Up Do dame van Pronty.
-
 I cut two cards from the A5 sheet and made two different cards out of them. On the first one I stencilled the Up Do lady by Pronty with Archival Potting Soil.
Op de andere heb ik uitgebreid gestempeld.
-
On the other one I stamped and coloured various images.

Om de kaarten af te maken sponsde ik langs de randen en ging met het donkerbruine inktkussen direct over de randjes. Daarna geplakt op creme-witte kaarten.

Ik hoop dat ik je met deze kaarten heb geïnspireerd. Ik heb in elk geval een aangename middag gehad met het maken er van!

Lieve groetjes,
-
To finish the cards I sponged around the edges and swiped the dark brown ink pad around the edges as well. Then I adhered them to off-white cardstock.

I hope I have inspired you with these makes. I surely had lots of fun making them!

Kind regards,


woensdag 2 januari 2019

Just Cool Dude!


Hallo lieve mensen,
Hello everyone ,

Allereerst de allerbeste wensen voor 2019! Dat het een mooi, creatief jaar mag worden voor jullie allemaal!!
First of all the best wishes for 2019! That it may be a beautiful, creative year for all of you !!

Vandaag heb ik een verjaardagskaartje met de lijn Pretty & Cool by Raffzz van Pronty Crafts voor jullie gemaakt . Ik heb deze gemaakt voor de 21e verjaardag van mijn zoon die in december jarig was.
Today I made a birthday card with the Pretty & Cool by Raffzz line from Pronty Crafts for you. I made this for the 21st birthday of my son, who celebrated his birthday in December.

Ik heb een Bendy-kaart gemaakt . Ik heb het patroontje van Internet. Soms is het wel eens fijn om even niet te hoeven denken, vooral in de drukke december maand, hoe je je kaartje gaat maken, maar gewoon even een patroontje volgen.  De achterkant van het kaartje kun je zo hoog maken als je zelf wilt. Vind ik zelf wel handig als je er veel op kwijt wilt. 
I have made a Bendy card. I have the pattern of the Internet. Sometimes it's nice to not have to think, especially in the busy December month, how to make your card, but just follow a pattern. The back of the card can be made as high as you want. I find it handy if you lose a lot on it


Wat je nodig hebt:
Set scrappapier 'Pretty & Cool' van Pronty Crafts 471.200.901
Bijbehorende stickervel 491.100.001
Zwart cardstock
Stansen
Distress inkt

What you need:
Set of scrap paper 'Pretty & Cool' by Pronty Crafts 471.200.901
Accompanying sticker sheet 491.100.001
Black cardstock
Die-cutting
Distress ink


Ik ben begonnen met het cardstock uit te snijden. De basis is 12 x 17 cm. De flapjes heb ik volgens patroon uitgesneden. Daarna heb ik de vouwlijnen gerild van de flapjes en deze  heb ik links en rechts aan de basiskaart geplakt. 
I started cutting out the cardstock. The base is 12 x 17 cm. I cut out the flap according to the pattern. Then I have the fold lines of the flap and I have these left and right to the base card pasted.


Vervolgens heb ik het designpapier uit gesneden. De randjes van het papier heb ik bewerkt met distressinkt ‘vintage photo’. Het designpapier heb ik op het cardstock geplakt. De flapjes rol ik om een petflesje om de ronding te krijgen.
Then I cut out the design paper. I have edited the edges of the paper with distress ink 'vintage photo'. I put the design paper on the cardstock. I roll the flap around a pet bottle to get the curve.


De basis van de kaart is nu al klaar. Ik heb de kaart versierd met snijmallen en de stickers die bij deze set Pretty &Cool horen. Met dubbelzijdig plakband ‘heb ik de flapjes in vorm’ geplakt.  

The basis of the card is already ready. I decorated the card with cutting templates and the stickers that belong to this set Pretty & Cool. With double-sided adhesive tape 'I glued the flap into shape'.


Zo zie je dat je toch relatief snel een aparte kaart kan maken. Er zijn een heleboel leuke kaartpatroontjes te vinden op Pintrest en de gave papierlijn van Pronty Crafts met bijbehorende embelishment zorgt ervoor dat je in korte tijd en tof kaartje kan maken. 

So you see that you can make a separate card relatively quickly. There are a lot of nice card patterns on Pintrest and the designpaper from Pronty Crafts with accompanying embelishment ensures that you can make a great card in a short time.


Ik wens jullie een creatieve dag toe. 
Tot een volgende keer !

I wish you a creative day.
See you next time !


vrijdag 14 december 2018

Winterkaartjes

Hallo en welkom,

Vandaag laat ik jullie zien hoe je deze gezellige winterkaartjes maakt met de leuke foamstempels van Pronty by Raffzz: Stars Pretty & Cool (494.001.013). 
-
Hello and welcome,

Today I want to show you how to make these cosy winter cards, using the fun foamstamps from Pronty by Raffzz: Stars Pretty and Cool (494.001.013),


Daar gaan we
-
Here we go


Stempel de sneeuwman op wit cardstock en stempel en knip een sneeuwman op masking papier. Plak deze sneeuwman op je gestempelde sneeuwman.
-
Stamp the snowman onto your white cardstock and stamp and cut one from masking paper. Place that one on top of your stamped image.


Plaats je gelli plate op een acrylblok. Rol met je brayer over je distress inktpad en breng zo inkt aan op je gelli plate. Het is nauwelijks zichtbaar, maar er komt echt inkt op je gelli plate.
-
Place your gelli plate onto an acrylic block. Roll your brayer over the distress ink pad and transfer the ink to your gelli plate. You can hardly see the ink on the plate, but it is definitely there.


Neem je schone foamstempel en stempel op je gelli plate. Op deze manier neem je inkt af. Stempel af op een stukje papier en herhaal deze stappen tot je een aantal sterren op de gelli plate hebt "gestempeld".
-
Take your clean foam stamp and stamp on top of the gelli plate. This way you take off the ink from the gelli plate. Stamp onto a piece of paper to take off the ink. Repeat these steps to "stamp" several stars on the gelli plate.


Stempel je gelli plate op je cardstocken druk stevig aan, je ziet de afdruk verschijnen. Ik gebruikte hier de twee grootste sterren van de set.
-
Stamp your gelli plate onto the cardstock and press, you can see the image of the gelli plate emerging. I used the two larger stamps of the set.


Kleur de afbeeldingen, stempel een tekstje en mat op bijpassend papier. 
-
Colour the images, stamp a sentiment and mat onto matching cardstock. 

Nog een paar details:
Met bruin potlood maakte ik een schaduwrand rond de afbeeding, zodat het lijkt of hij is opgeplakt.
Met een paper distresser ruwde ik de randjes wat op.

Ik hoop dat je mijn kaarten leuk vindt. Vergeet niet om jouw artwork met Pronty producten te laten zien op onze Facebook groep!

Groetjes,

-
A few details:
With brown pencil I added a shadow around the image, to make it look like it is raised.
With a paper distresser I roughed up teh edges of the white card a bit.
-
I hope you like my cards. Don't forget to show us your artwork with Pronty products on our Facebook group!

Kind regards,


zaterdag 24 november 2018

Two Holiday Watercolor Cards


Hallo allemaal,

Vandaag heb ik een inspirerende blog met de geweldige stempels van Pronty voor jullie. De sterren passen geweldig bij een kerstmis thema en werden gelijk twee kerstkaarten. :)

Ik maakte water color kaarten. Ik hou van deze watercolor-look. Voor de achtergrond gebruikte ik de Harmony inkt pads van spectrum noir. Het watercolor papier is super om achtergronden te maken.

Hello everybody,


Today I have an inspiration with the great stamps of Prontycrafts for you. The stars immediately jumped on the Christmas train and became two cards. :)

I made watercolor cards. I like this watercolor look. For the background I used the Harmony Inkpads from Spectrum Noir. The watercolor paper is great for creating backgrounds.


Er is ook een stencil in hetzelfde thema als de stempels.

In the same look as the stamps, there is also a stencil.

 
Ik maakte het stencil vast en bracht met een bkending tool inkt van het embossing inktpad aan. Daarna gebruikte ik WOW Embossing poeder. 
 

I hung it up and colored it with a blending tool and Embossinginkpad. Then I used WOW Embossing Powder.

 Zie je hoe het glimt?
 

Do you see how that sparkles?

Dit zijn mijn kaarten, ik hoop dat je ze leuk vind :)

And here are my finished cards. I hope, you like them :)


Geniet van het maken van je kerstkaarten :)

Tot de volgende keer, Dunja xx


Enjoy your time creating holidaycards :)

Till next time, Dunja xx