Pagina's

zondag 27 januari 2019

Valentijnskaartje

Hallo iedereen,
vandaag ga ik aan de slag om een valentijnskaart te maken.

Hello everyone,
Today I will be making a valentines day card

Hiervoor moest ik wel de geweldig leuke stencil
 van Julia Woning met de lippen (470.765.004) gebruiken.
Ik had een iets dikker papier genomen 
om het blenden vlotter te laten gaan,
vervolgens heb ik het stencil vastgeplakt aan mijn werkblad.  
En deze keer heb ik niet met een dauber gewerkt, 
maar gewoon met een droge, zachte verfborstel,
hierdoor krijg je een zachter resultaat van het blenden, 
ik moet zeggen, 
ik vind het effect enorm geslaagd.


I just had to use the amazing stencil by Julia Woning with the lips (470.765.004).
I used a slightly thicker cardstock this time
to make the blending a bit easier.
I've taped the stencil on my work surface.
This time, I didn't use a dauber, but instead
a normal, dry & soft paint brush,
you'll get a really subtle look with blending,
and I must say,
I really really like this effect.

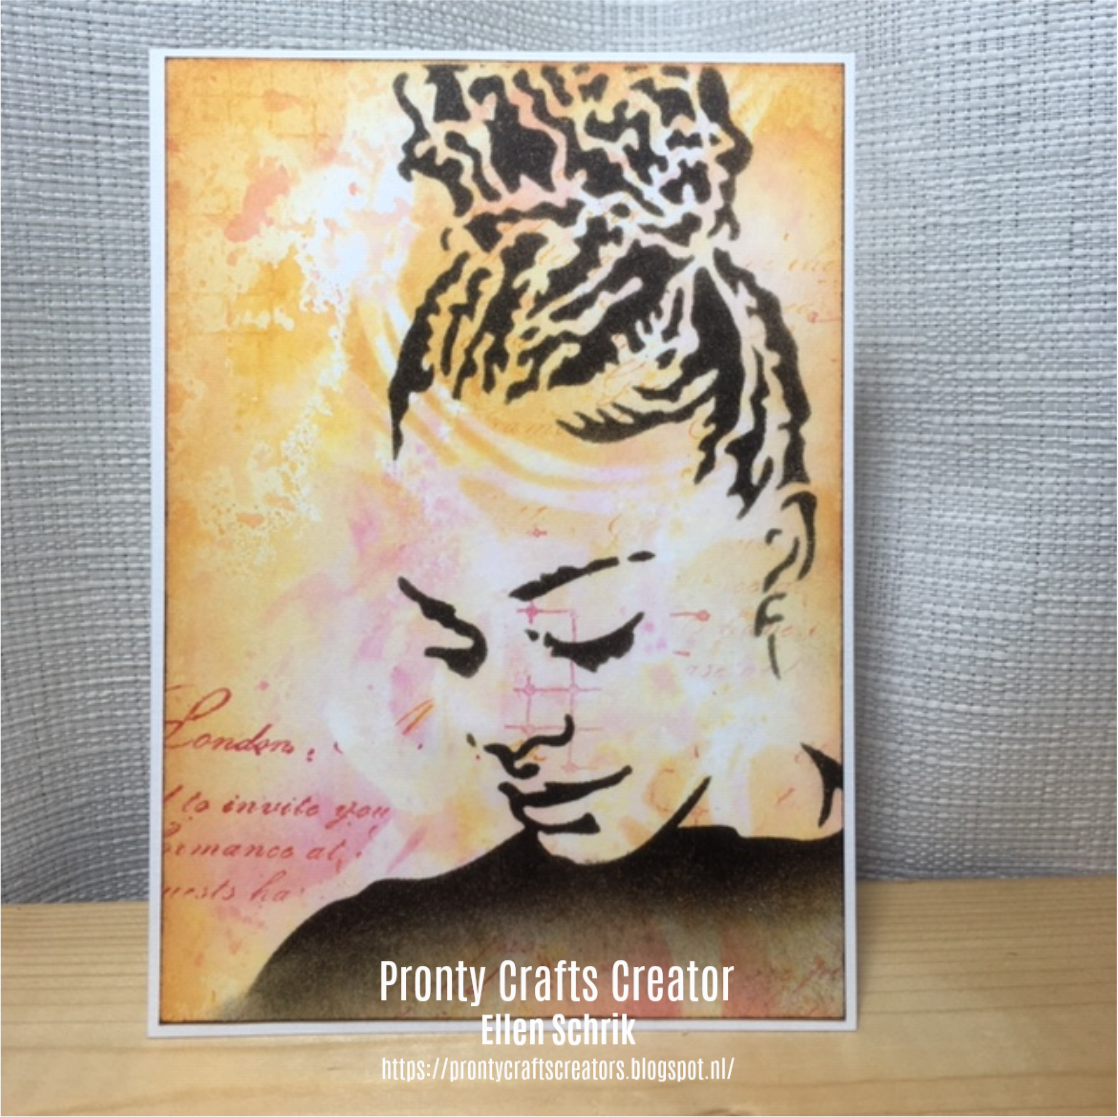
Hier het resultaat van het blenden, 
ik heb 2 kleuren van de Distress Oxides gebruikt, 
ik vind deze inkten enorm geschikt voor het blenden,
 sommige stukjes zijn daardoor iets donkerder geworden


Here you see the result of the blending,
I've used 2 colours of ink Distress Oxides, 
I really like the inks for blending
some areas are a bit darker because of that.

Ik heb een hart stans gebruikt en vervolgens vastgelijmd.

I've used a heart die
which I glued to the cardstock

Vervolgens nog een tekstje 3 keer uitgestansd 
en op elkaar gelijmd voor een beetje dimensie

I've cut out the word 3 times, 
and glued it together for a bit of dimension

Tot slot, nog een extra laagje onder de kaart, en op een kaartbasis gedaan.
Ik vind het een heel leuk kaartje geworden.
Het is niet te hevig, 
ik hou van de iets simpelere kaarten

Finally, I've added an extra layer of cardstock
and glued everything on a side folded card.
I really like how this card turned out.
It's not too busy,
I love the simplicity of a handmade card


Dit was mijn blogpost voor deze maand, 
hopelijk zijn jullie weer geïnspireerd geraakt om 
zelf aan de slag te gaan met de producten van Pronty Crafts.
Laat zeker jullie creaties zien in onze Facebook groep.
vind het super om iedereen zijn creaties te bekijken
Fijne dag iedereen 


This was my blogpost for this month,
hopefully you all got inspired to create some 
beautiful things on your own, 
with the product of Pronty Crafts
Be sure to upload your pictures in our Facebook group.
Love to see all your work
Have a nice day

zaterdag 26 januari 2019

Classy Lady Stamp by Julia Woning 


 Beste Bloglezers,   

vandaag laat ik je zien hoe je met de Classy Lady stempel een prachtige art journal pagina kunt maken. 


Hier teken ik een lichaam aan de stempel. Als je de foto uitprint kunje het met de stempel gebruiken om zelf zo'n dame temaken.
    ~   
Dear Blog readers, today I show you how you can make a art journal page with the Classy lady stamp. 


Daarna ga ik verder met het kleuren van de dame. Dit doe ik met de Detwent inktense travel set.
~    
 Then I give the lady colour with Derwent Inktense travel set.   

Bekijk hier onder de video. Ik hoop dat ik je heb kunnen inspireren   Tot een volgende keer   
Julia  
  ~  
 I hope I can inspire you.  See you next time  

 Julia      


woensdag 23 januari 2019

Serie 3 van Pronty Crafts by Julia Woning

Beste bloglezers,

 voor deze nieuwe lijn van Pronty Crafts by Julia Woning kun je al een pre-order plaatsen bij je hobbywinkel. De levering zal februari zijn. Nog even geduld, maar binnenkort kun je zelf aan de slag met deze ontwerpen van Pronty Crafts by Julia Woning.       
~
 For this new line of Pronty Crafts by Julia Woning you can already place a pre-order at your hobby shop in Holland. Delivery will be in Februari  (in the Netherlands). Just have a little patience soon you can get started with these designs by Pronty Crafts by Julia Woning.    

Serie 3


 Serie 1


Serie 2


zondag 20 januari 2019

voorjaarskaars

Hallo allemaal,

Ik wilde alvast een beetje voorjaar in huis halen. Daarom heb ik een kaars gedecoreerd in voorjaarskleuren. - I wanted to bring some spring in my home. That's why I decorated a candle in spring colors. 

  Van de bestaande kaars heb ik als eerste het etiket verwijderd. - At first I removed the label from the candle.

Het etiket heb ik gebruikt als mal om over te trekken op aquarel papier. - I used the label as a template and traced it on watercolour paper. 

Vervolgens heb ik het papier gekleurd met distress oxide in de kleur fossilized amber en een inkt blending tool. Daarna heb ik gespetterd met wat water. - Then I colored the paper with distress oxide in the color fossilized amber and a ink blending tool. Afther that I made some splatters with water.

Met distress inkt in de kleur frayed burlap heb ik de foamstempel dry ground (494.001.003) over het geheel gestempeld. - With distress ink in the color frayed burlap I've staped the foamstamp dry ground (494.001.003) over the whole paper.   

Daarna heb ik een foamstempel van de set Birds by Julia (494.904.003) ingekleurd met ecoline brush pennen. - Then I've colored one of the birds of the Birds by Julia set (494.904.003) with my ecoline brush pens. 

Een stempel met een vogel quote maakt het geheel af. Daarna heb ik het geheel met dubbelzijdig plakband weer vastgeplakt aan de kaars. - I've stamped a quote about birds and assembled the whole piece with doule sided tape.

En dan is mijn voorjaarskaars klaar ! Dit is ook erg leuk om als cadeautje te maken. - And then my spring candle is ready ! It's also very nice to make a candle like this for a present. 

Op onze Facebook-pagina Pronty and friends kun je laten zien wat jíj hebt gemaakt met Pronty producten. We zijn erg benieuwd!

Groetjes, - On our Facebook page Pronty and Friends you can show what you made with Pronty products. We look forward to see your artwork! Kind regards,


donderdag 17 januari 2019

Lovely Ladies by Julia Woning

Beste Bloglezers, 
 vandaag laat ik je zien hoe je met de Lovely Lady stencil een prachtige art journal pagina kunt maken. Ik gebruik de stencil als mal. Hier teken ik de Lovely Lady na. Ik gebruik hiervoor een grafietpotlood.  
 Dear Blog readers,
today I show you how you can make a art journal page with the lovely lady stencil. I use the stencil as a mold. I use a graphite pencil to draw on the tag. 


 Daarna gum ik de lijnen zoveel mogelijk weg, maar nog net dat je het kunt zien. Dan ga ik de dame voorzien van kleur. Ik begin eerst met de huidskleur. Ik pak hiervoor een oker geel en een roze tint uit de set van Coloursoft. Welke dat maakt niet zo uit probeer gewoon verschillende combinaties en kies die jij mooi vindt. Daarna ga ik verder met het kleuren van de dame. 
 ~ 
 With colour pencils I give it color. I start with the skin color. I have a yellow ocher and a pink tint from the Coloursoft set. Which one you choose does not matter so just try different combinations and choose which you love. I continue with the coloring of the lady. 


 Als de dames zijn gekleurd met meerdere lagen en vele kleurcombinaties ga ik het geheel blenden met terpentine. Ik vind het fijn om dit te doen met een watte staafje. Zie hoe prachtig de kleuren samen smelten.  
 ~ 
 Colored the ladies with multiple layers and many color combinations I will blend the whole with turpentine. I like to do this with a soft stick. See how beautifully the colors melt together. 


 Dan ga ik met panpastel werken. Met een sofft tool breng ik een patroon aan met het stencil. Als ik klaar bent fixeer ik het geheel zodat de panpastel niet meer af geeft. 
 ~  
I give some extra detail with panpastel and a stencil. I fixate it with fixative. 


Bekijk de video Ik hoop dat ik je heb kunnen inspireren 
 Tot een volgende keer 
 Julia 
 ~ 
I hope I can inspire you
See you next time 
 Julia    


Stencil Lovely Lady by Julia (470.765.001)


maandag 14 januari 2019

Two cards, one background

Hallo allemaal,

Vandaag laat ik jullie twee kaarten zien, die ik maakte uit één achtergrond. De Pronty producten die ik gebruikt heb zijn:
A4 stencil Grunge circles by Julia Woning 470.765.005
15 x 15 stencil Up do 470.801.048
-
Hello and welcome

Today I would like to show you two cards I made from one background. These are the Pronty products I used:
A4 stencil Grunge circles by Julia Woning 470.765.005
15 x 15 stencil Up Do 470.801.048


Daar gaan we:
Ik depte distress inkt op het stencil en spoot er water op.
-
Here we go:
I pressed distress inkpads onto the stencil and spritzed with water.


Ik legde een vel aquarelpapier op het stencil en drukte het aan.
-
I put a watercoour paper on top and pressed.

Op een tweede vel legde ik het gebruikte stencil om nog een afdruk te maken. Het werd erg licht, dus legde ik het vel in de inkt op die nog op mijn craftsheet lag. Wow, die was mooi!
-
On a second sheet I put the stencil again to make an impression of the circles. It didn't work out that well, so I pushed the sheet into the ink that was left on my craft sheet. Wow, what a nice surprise!


Ik besloot met het tweede vel verder te gaan. Het (inmiddels schone) stencil legde ik op het gedroogde vel en stempelde tekst door het stencil. Daarna sponsde ik met dezelfde kleuren, met het stencil nog steeds op het vel.
-
I decided to work on the second sheet. I put the (now clean and dry) stencil on the sheet and stamped text through the stencil. After that I sponged with the same colours, with the stencil still in place. 


Ik sneed twee kaarten uit dit A5-vel en bewerkte ze op verschillende manieren.
Op de eerste stencilde ik met Archival Potting Soil de Up Do dame van Pronty.
-
 I cut two cards from the A5 sheet and made two different cards out of them. On the first one I stencilled the Up Do lady by Pronty with Archival Potting Soil.
Op de andere heb ik uitgebreid gestempeld.
-
On the other one I stamped and coloured various images.

Om de kaarten af te maken sponsde ik langs de randen en ging met het donkerbruine inktkussen direct over de randjes. Daarna geplakt op creme-witte kaarten.

Ik hoop dat ik je met deze kaarten heb geïnspireerd. Ik heb in elk geval een aangename middag gehad met het maken er van!

Lieve groetjes,
-
To finish the cards I sponged around the edges and swiped the dark brown ink pad around the edges as well. Then I adhered them to off-white cardstock.

I hope I have inspired you with these makes. I surely had lots of fun making them!

Kind regards,


vrijdag 11 januari 2019

Do what makes you happy

Hallo allemaal,
 
Ik heb vandaag weer een Art Journal pagina gemaakt, dit keer in een groot Art Journal. Ik heb gewerkt met acrylverf, stencils en foamstempels. Ik heb de volgende producten van Pronty gebruikt: A4 stencil Grunch Circle 470.765.005, Spiral 494.001.011, Kisses 494.904.006 en twee foamstempels.
 
-
 
Hello everyone,
I've made another Art Journal page today, but this time I used a large Art Journal. I've worked with acrylic paint, stencils and foam stamps. I've used the following Pronty products: A4 stencil Grunch Circle 470.765.005, Spiral 494.001.011, Kisses 494.904.006 and two foam stamps.
 
Deze vier kleuren heb ik gebruikt om de achtergrond te maken. - These are the colours that I've used to make the background.
Ik heb eerst wat water over de pagina heen gesprayed en toen de verf verdeeld over het papier, doordat de pagina nat is kan ik de verf heel gemakkelijk uitsmeren over de gehele pagina. Links zie je mijn achtergrond, ik heb de achterkant van een andere pagina op de natte verf gelegd, zo heb ik ook vast een begin van mijn achtergrond op die pagina.   - First I sprayed some water on the paper and after that I put the paint on the paper, because the paper is wet, it is very easy to spread the paint across the paper. I've made the background on the left paper and put the other paper on it, so I've made a start with that background as well.
Ik heb het stencil op mijn pagina gelegd en ben er met zwarte acrylverf overheen gegaan, zo komen de kleuren van de ondergrond nog mooier uit.   - I put the stencil on the paper and went over it with black acrylic paint, this makes the colours of the background stand out more.
Vervolgens heb ik met twee verschillende foamstempels en witte acrylverf hier en daar op de pagina gestempeld. - After that I used two different foam stamps and white acrylic paint.
Met een ander stempel heb ik woordjes gestempeld op wit papier, uitgeknipt en opgeplakt. - Used another stamp to stamp the words on white paper, I cut them out and glued them on the paper.
Als laatste heb ik nog met witte acrylverf lekker gespetterd en nog een tekst gestempeld en opgeplakt. Hopelijk heb ik jullie kunnen inspireren.
 
Met vriendelijke groet,   - Lastly, I created spatters with white acrylic paint and stamped another text that I also glued on the paper. Hopefully I've been able to inspire you. Kind regards,