Pagina's

Posts tonen met het label Ellen. Alle posts tonen

donderdag 14 februari 2019

Save all your kisses for me

Hallo en welkom,
 
Vandaag, op Valentijsdag, heb ik een tag met veel zoenen voor jullie. Kijk je mee hoe ik deze gemaakt heb?
 
De stencils die ik gebruikt heb zijn:
Triptych A4 (470.803.046)
A5 Grunge 1 (470.802.072)
Kisses A4 van Julia Woning (470.765.004)
 
-
 
Hello and welcome,
 
Today, on Valentine's day, have have a tag with lots of kisses for you. Want to see how I made it? Come along!
 
I used the following stencils:
Triptych A4 (470.803.046)
A5 Grnunge 1 (470.802.072)
Kisses A4 by Julia Woning (470.765.004)
Ik begon met dotjes blauwe verf op een grote tag (die al in de witte gesso gezet was) van 10 x 23 cm en smeerde ze uit met een oud pasje. Daarna bracht ik op dezelfde manier roze verf aan. Door de blauwe verf niet overal aan te brengen en de roze een beetje over het blauw te laten lopen, krijg je mooie kleurschakeringen.
 
-
 
I started with adding a few drops of blue paint to a large tag (pre-gessoed) (10 x 23 cm) and I spread it out with an old savings card. I did the same with pink paint. By not covering the whole tag with the blue paint and overlapping the blue a little with the pink paint, you get nice colour combinations.
 
 
Daarna bracht ik door verschillende stencils witte en zwarte gesso aan:
-
Then I added white and black gesso through stencils:
 
Daarna gestempeld met een blokje, omwikkeld met hennep bindtouw, met doppen en daarna gespetterd met verdunde gesso. 
 
-
 
Then some stamping with gesso with twine, twisted around a wooden block, with lids and some splatters with thinned gesso.
 
 
Hij was nog wat te leeg naar mijn idee, dus stencilde ik er nog wat kleine rondjes op.
 
-
It was just a bit too empty, so I stencilled some small circles on top.
Met distress-inkt sponsde ik een paar zoenen op een apart vel papier, om sommige tekende ik een zwarte rand met een paint marker en knipte ze uit.
 
-
 
I sponged some kisses on a separate piece of paper, using distress ink. I outlined some of them with a black paint marker and cut them out.
Ook stempelde en kleurde ik het meisje en schreef ik een tekst die ik voor vandaag wel toepasselijk vind. Deze knipte ik in losse woordjes.
 
-
 
I stamped and coloured the little girl and I wrote a text that I found appropriate for today. I cut it into separate words.
 
Ben je geïnspireerd door onze creaties? Wat fijn! Op onze Facebookgroep kun je jouw creaties met Pronty producten laten zien. We zijn erg benieuwd!
 
Groetjes,
 
-
 
Are you inspred by our makes? That's great! On our Facebook group you can show us your makes, using Pronty products. We look forward to see them!
 
Kind regards,


maandag 14 januari 2019

Two cards, one background

Hallo allemaal,

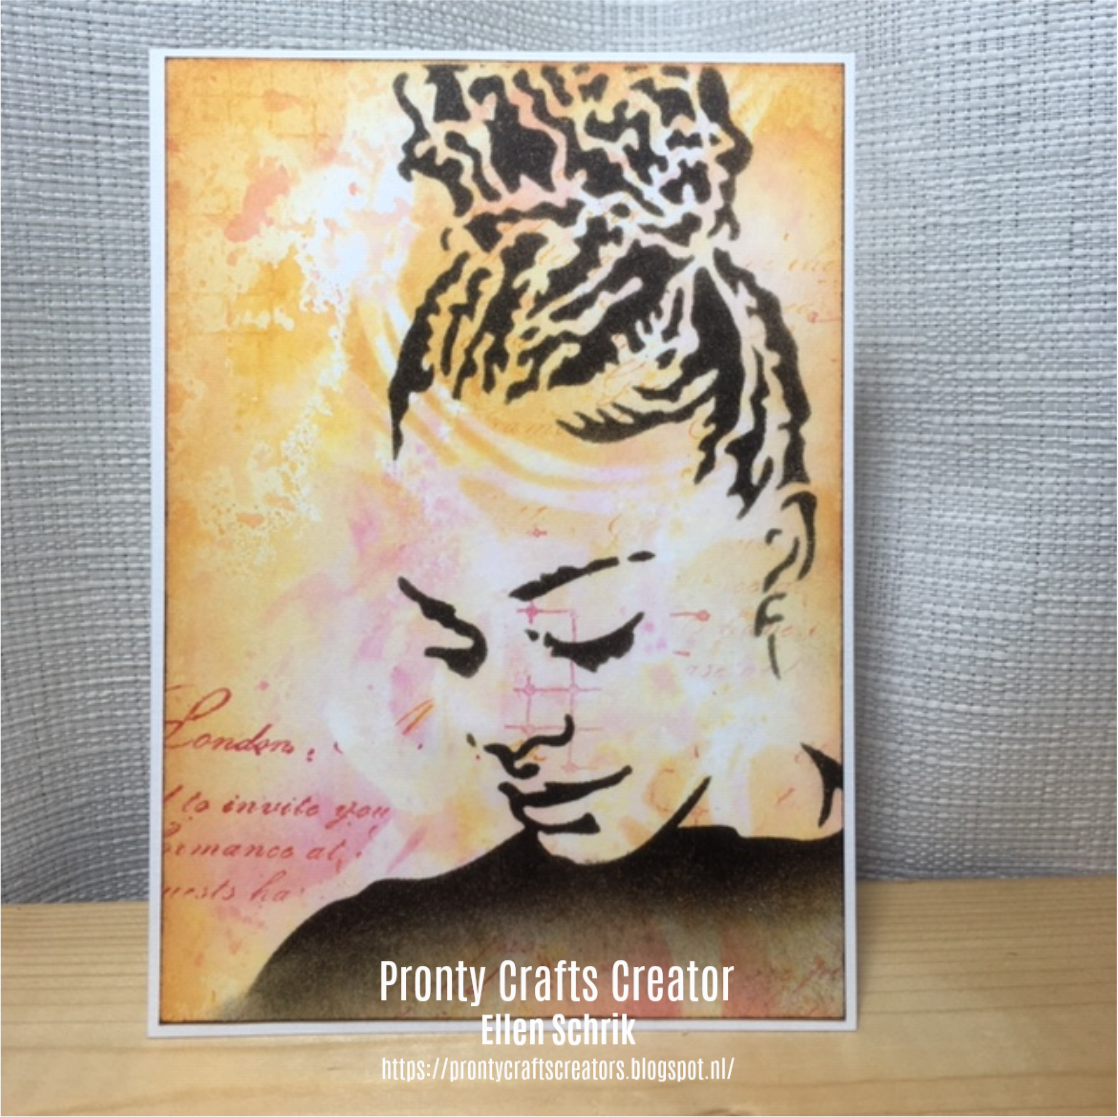
Vandaag laat ik jullie twee kaarten zien, die ik maakte uit één achtergrond. De Pronty producten die ik gebruikt heb zijn:
A4 stencil Grunge circles by Julia Woning 470.765.005
15 x 15 stencil Up do 470.801.048
-
Hello and welcome

Today I would like to show you two cards I made from one background. These are the Pronty products I used:
A4 stencil Grunge circles by Julia Woning 470.765.005
15 x 15 stencil Up Do 470.801.048


Daar gaan we:
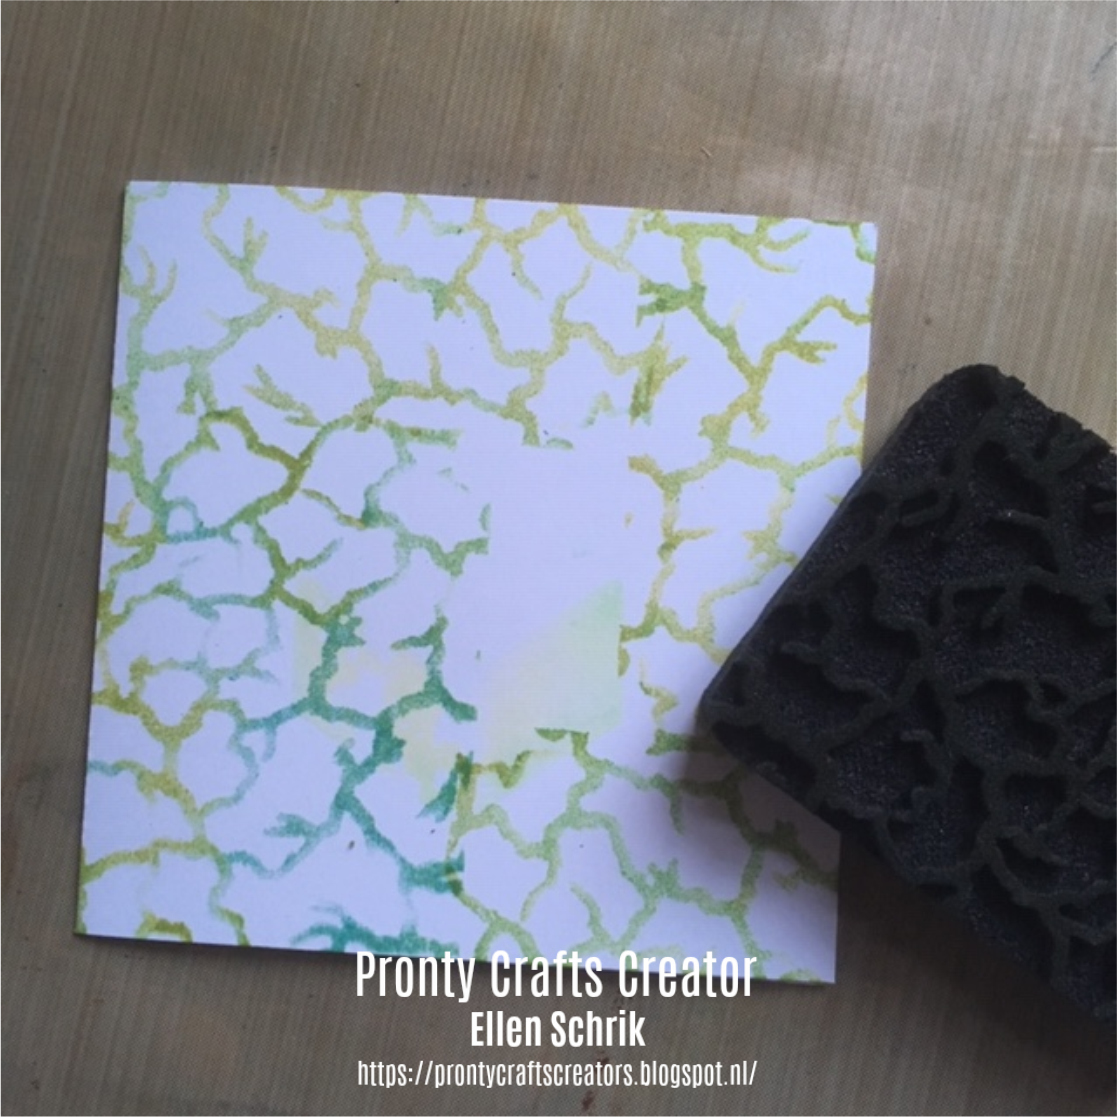
Ik depte distress inkt op het stencil en spoot er water op.
-
Here we go:
I pressed distress inkpads onto the stencil and spritzed with water.


Ik legde een vel aquarelpapier op het stencil en drukte het aan.
-
I put a watercoour paper on top and pressed.

Op een tweede vel legde ik het gebruikte stencil om nog een afdruk te maken. Het werd erg licht, dus legde ik het vel in de inkt op die nog op mijn craftsheet lag. Wow, die was mooi!
-
On a second sheet I put the stencil again to make an impression of the circles. It didn't work out that well, so I pushed the sheet into the ink that was left on my craft sheet. Wow, what a nice surprise!


Ik besloot met het tweede vel verder te gaan. Het (inmiddels schone) stencil legde ik op het gedroogde vel en stempelde tekst door het stencil. Daarna sponsde ik met dezelfde kleuren, met het stencil nog steeds op het vel.
-
I decided to work on the second sheet. I put the (now clean and dry) stencil on the sheet and stamped text through the stencil. After that I sponged with the same colours, with the stencil still in place. 


Ik sneed twee kaarten uit dit A5-vel en bewerkte ze op verschillende manieren.
Op de eerste stencilde ik met Archival Potting Soil de Up Do dame van Pronty.
-
 I cut two cards from the A5 sheet and made two different cards out of them. On the first one I stencilled the Up Do lady by Pronty with Archival Potting Soil.
Op de andere heb ik uitgebreid gestempeld.
-
On the other one I stamped and coloured various images.

Om de kaarten af te maken sponsde ik langs de randen en ging met het donkerbruine inktkussen direct over de randjes. Daarna geplakt op creme-witte kaarten.

Ik hoop dat ik je met deze kaarten heb geïnspireerd. Ik heb in elk geval een aangename middag gehad met het maken er van!

Lieve groetjes,
-
To finish the cards I sponged around the edges and swiped the dark brown ink pad around the edges as well. Then I adhered them to off-white cardstock.

I hope I have inspired you with these makes. I surely had lots of fun making them!

Kind regards,


vrijdag 14 december 2018

Winterkaartjes

Hallo en welkom,

Vandaag laat ik jullie zien hoe je deze gezellige winterkaartjes maakt met de leuke foamstempels van Pronty by Raffzz: Stars Pretty & Cool (494.001.013). 
-
Hello and welcome,

Today I want to show you how to make these cosy winter cards, using the fun foamstamps from Pronty by Raffzz: Stars Pretty and Cool (494.001.013),


Daar gaan we
-
Here we go


Stempel de sneeuwman op wit cardstock en stempel en knip een sneeuwman op masking papier. Plak deze sneeuwman op je gestempelde sneeuwman.
-
Stamp the snowman onto your white cardstock and stamp and cut one from masking paper. Place that one on top of your stamped image.


Plaats je gelli plate op een acrylblok. Rol met je brayer over je distress inktpad en breng zo inkt aan op je gelli plate. Het is nauwelijks zichtbaar, maar er komt echt inkt op je gelli plate.
-
Place your gelli plate onto an acrylic block. Roll your brayer over the distress ink pad and transfer the ink to your gelli plate. You can hardly see the ink on the plate, but it is definitely there.


Neem je schone foamstempel en stempel op je gelli plate. Op deze manier neem je inkt af. Stempel af op een stukje papier en herhaal deze stappen tot je een aantal sterren op de gelli plate hebt "gestempeld".
-
Take your clean foam stamp and stamp on top of the gelli plate. This way you take off the ink from the gelli plate. Stamp onto a piece of paper to take off the ink. Repeat these steps to "stamp" several stars on the gelli plate.


Stempel je gelli plate op je cardstocken druk stevig aan, je ziet de afdruk verschijnen. Ik gebruikte hier de twee grootste sterren van de set.
-
Stamp your gelli plate onto the cardstock and press, you can see the image of the gelli plate emerging. I used the two larger stamps of the set.


Kleur de afbeeldingen, stempel een tekstje en mat op bijpassend papier. 
-
Colour the images, stamp a sentiment and mat onto matching cardstock. 

Nog een paar details:
Met bruin potlood maakte ik een schaduwrand rond de afbeeding, zodat het lijkt of hij is opgeplakt.
Met een paper distresser ruwde ik de randjes wat op.

Ik hoop dat je mijn kaarten leuk vindt. Vergeet niet om jouw artwork met Pronty producten te laten zien op onze Facebook groep!

Groetjes,

-
A few details:
With brown pencil I added a shadow around the image, to make it look like it is raised.
With a paper distresser I roughed up teh edges of the white card a bit.
-
I hope you like my cards. Don't forget to show us your artwork with Pronty products on our Facebook group!

Kind regards,


maandag 5 november 2018

Colourful bird

Hallo en welkom,

Vandaag alweer een kaart met een vogel. Het hele designteam vindt ze leuk!
-

Hello and welcome,

Today another card with a bird, the whole team loves birds!


Hieronder kun je stap voor stap zien hoe ik deze kaart gemaakt heb. Voor de achtergronden heb ik gebruik gemaakt van de stencils en foamstempels uit de "Grunge-lijn" van Pronty. En op het eind heb ik nog een tip!
-
Below you can see step by step how I made this card. For the backgrounds I used the stencils and foam stamps from the "Grunge" series by Pronty. And at the very end of this post I have a tip for you!


Begin met sponzen van een kaartje. Ik gebruikte slechts twee kleuren.Door ze te overlappen ontstaat een derde kleur.
-
Start with sponging your card. I used only two colours. By overlapping them you get a third colour.

Stempel met een wat vochtige foamstempel op dit kaartje. Hierdoor neem je kleur weg. Wel steeds goed afvegen aan een stukje keukenpapier! Op de foto is het bijna niet te zien, maar je neemt zo echt kleur weg. Ik gebruikte: 
494.001.011 Spiral
494.001.010 Chevron
-
Stamp with a damp foam stamp on your card. This way you remove colour. Don't forget to wipe the stamp off on a paper towel! You can hardly see it in the picture, but you really do take away some colour. I used:
494.001.011 Spiral
494.001.010 Chevron

Stempel met dezelfde foamstempels, nu met de gebruikte distress inkten
-
Stamp with the same foam stamps, this time with the same colours distress inks.


Spons hier en daar door stencils voor nog meer diepte op je kaart. Hieronder zie je
A5 470.802.072 Grunge 1 
15 x 15 cm 470.801.053 Grunge 1
-
Sponge on several spots through stencils for more depth. These are the ones I used:
A5 470.802.072 Grunge 1 
15 x 15 cm 470.801.053 Grunge 1

Op de basiskaart stempel je met een foamstempel, waarop de twee kleuren inkt zijn aangebracht. Doe dit rondom je kaart, met
494.001.012 Dry ground
-
On the card base, stamp with a foam stamp, inking up the stamp with the two colors at the same time. Stamp a wide border this way with
494.001.012 Dry ground 

-

Stempel, kleur en knip de vogel, plak deze op je kaart.
Van de mat is alleen de rand beïnkt, rechtsreeks met het stempelkussen.
-
Stamp, colour and cut the bird and adhere to your card.
The mat is only inked up at the edge, using the ink pad.


TIP
Ik wist nog niet zeker waar ik de tekst wilde hebben. Daarom stempelde ik de tekst op een stukje hard plastic verpakkingsmateriaal, zodat ik kon kijken wat ik het mooiste vind. Hieronder zie je met gestempelde sheet en de verschillende mogelijkheden.
-
TIP
I wasn't sure where to put my sentiment, so I stamped it onto a sheet of plastic. That way I could check what the right place was to stamp the sentiment. Below you can see my stamped sheet and the options.

En dit is dan het eindresultaat. Ik ben er blij  mee.

Lieve groetjes,
-
And this is the finished card, I'm happy with it.

Kind regards,


zondag 14 oktober 2018

Cadeaumapje

Hallo en welkom,

Vandaag laat ik jullie zien hoe je met stencils zelf je designpapiertjes kunt maken voor een boekje met insteekvakjes. Deze insteekvakjes heb ik op maat gemaakt voor de zakjes met een maskertje, een perfect cadeau voor een tienermeisje. Het boekje is gebaseerd op de theezakjes-boekjes die je veel op het internet vindt.
-
Hello and welcome,

Today I want to show you how to make your own design papers for an envelope booklet. The pockets were made to fit the sachets with a peeling mask, a perfect little gift for a teenage girl. The booklet is based on the tea bag booklets you can find on the internet.


Ik begon met het snijden van de insteekvakjes uit dik blauw papier. Ik maakte ze iets ruimer dan de zakjes zelf natuurlijk. Door het nieuwe stencil Grunge1 (150 x150 mm) sponste ik lichtblauwe inkt. Ik draaide het stencil een kwartslag en sponste met een donderder blauw er boven op. Daarna plakte ik de insteekvakjes in elkaar en stanste er een hapje uit.
-
I started with cutting the pockets from light blue, heavy paper. I made them a little larger than the sachets of course. Through the new stencil Grunge1 (150 x 150 mm) I sponged with light blue ink. I turned the stencil and sponged on top, this time with a darker blue. Then I glued the pockets and die cut a half circle from the top.


De omslag is ietsje ruimer dan de pockets en heeft een flap. Het bestaat uit twee stroken kraft karton die op de rug/onderkant aan elkaar zijn gelijmd. Uit het lichtblauwe papier sneed ik stroken die net iets smaller zijn dan het karton en sponste door het stencil Grunge 1 (A5) met de donkerblauwe inkt die ik al eerder gebruikte. Deze plakte ik op de omslag. Een sluiting er aan was gauw gemaakt door twee cirkels te ponsen uit een restje en met spitpennen te bevestigen.
-
The cover is a little larger than the pockets and has a flap to close. It is made from two pieces of kraft cardstock and glued on the back/bottom. From the light blue paper I cut long pieces, just a little smaller than the kraft pieces. I sponged through the stencil Grunge 1 (A5) with the dark blue ink I had used on the pockets. I adhered them to the cover. A closure was easily made with two die cut circles from a left over piece, attached with split pins.


Tot slot maakte ik een label om een wens op te stempelen, weer met dezelfde materialen. Op de plek waar de tekst moest komen legde ik een strookje papier bij het sponsen van de donkere inkt. Zo blijft de tekst goed leesbaar. De lichte inkt sponste ik wel over het gehele label.
-
To finish it, I made a tag with a wish, again using the same materials. On the spot where I wanted the sentiment I put down a strip of paper when sponging the darker colour. This way the sentiment will stand out. The light ink is sponged over the entire tag.


In mijn pockets stopte ik zakjes met maskertjes, maar je kunt er natuurlijk ook labeltjes, geld of theezakjes in doen, of andere platte cadeautjes!
Ik hoop dat je mijn tutorial leuk vond. Het was in elk geval een erg leuk project om te maken!

Stencils:
Grunge 1 (150 x 150): 470.801.053
Grunge 1 (A5): 470.802.072

Lieve groetjes,
-
I put sachets with peeling masks in the pockets, but there are lots of other things you can put in, like tags, money or tea bags!
I hope you enjoyed my tutorial. It was a very nice project to make, I had an wonderful afternoon!

Stencils:
Grunge 1 (150 x 150): 470.801.053
Grunge 1 (A5): 470.802.072

kind regards,