Pagina's

donderdag 28 juni 2018

Een Project Life pagina


Hey iedereen, 
vandaag laat ik zien hoe je een Project Life pagina maakt met stencils.  
Ik sta hopeloos achter met Project Life, 
maar stilletjes aan ben ik aan een inhaalrace begonnen.


Hi everyone,
today I will show you how you can create a Project Life page, with all the stencils.
I'm behind on my Project Life, 
but I will slowly catch up


Ik houd van de simpele layouts, en zeker niet te druk, 
dit is mijn pagina geworden, 
hieronder vertel ik je over hoe hij gemaakt is

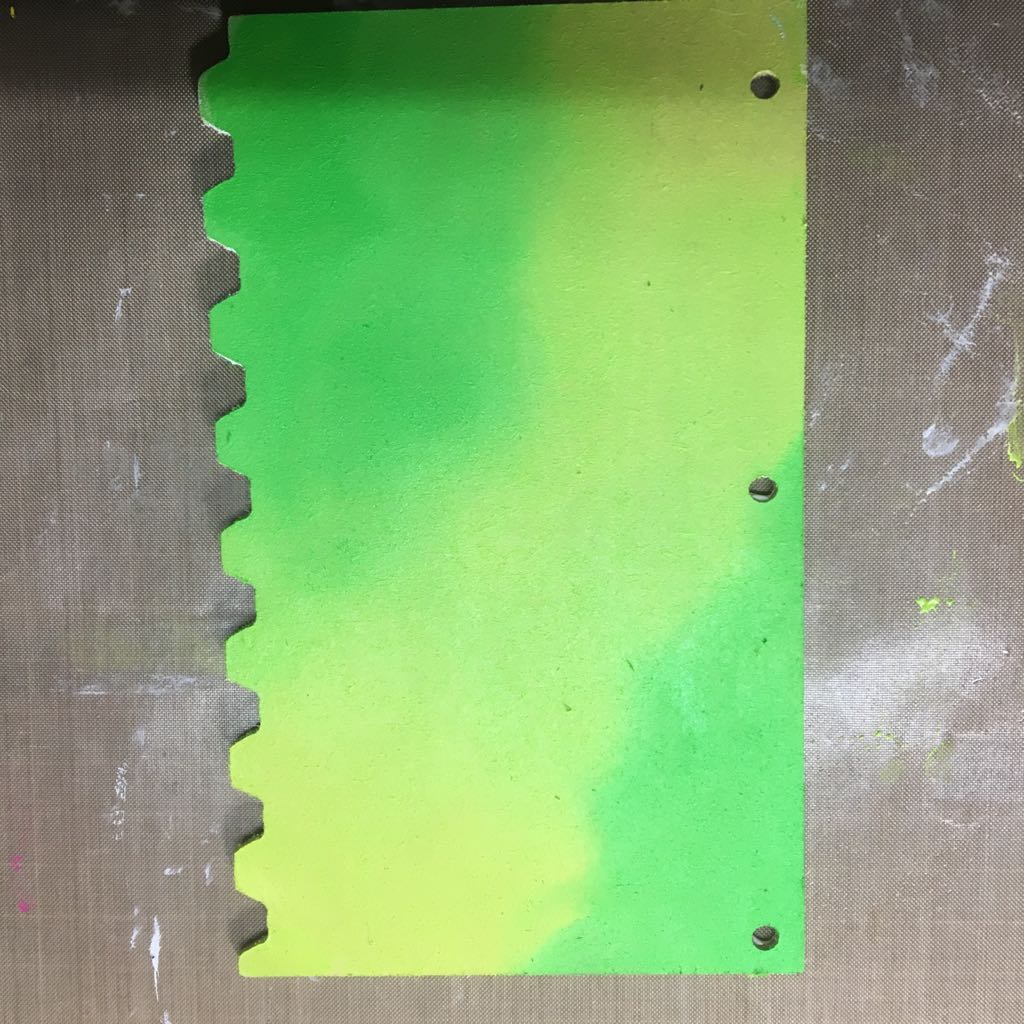
Ik werk het liefste op Mixed Media papier.
Ik ben begonnen met kaartjes te snijden voor mijn layout.
4 kaartjes van 4x6inch, en 4 kaartjes van 3x4 inch


I really love the simplicity of layouts, and not the busy ones.
This is how my page was created.
I'll show you how I've made it

I like working on Mixed Media paper.
I started out with cutting my cards:
4 cards of 4x6inch, en 4 cards of 3x4inch


Voor mijn eerste kaartje wilde ik graag een achtergrond maken 
om het paard met ruiter van de Wild West stencils te gebruiken (470.850.002)
Ik nam 2 kleurtjes inkt, en begon de eerste cactus te kleuren, 
vervolgens maakte ik er nog 2 extra bij


For the first card, I wanted to create a background
because I wanted to use the horse and rider from the Wild West stencils (470.850.002)
I blended 2 colours of ink for the cacti, and I've made 3 of them


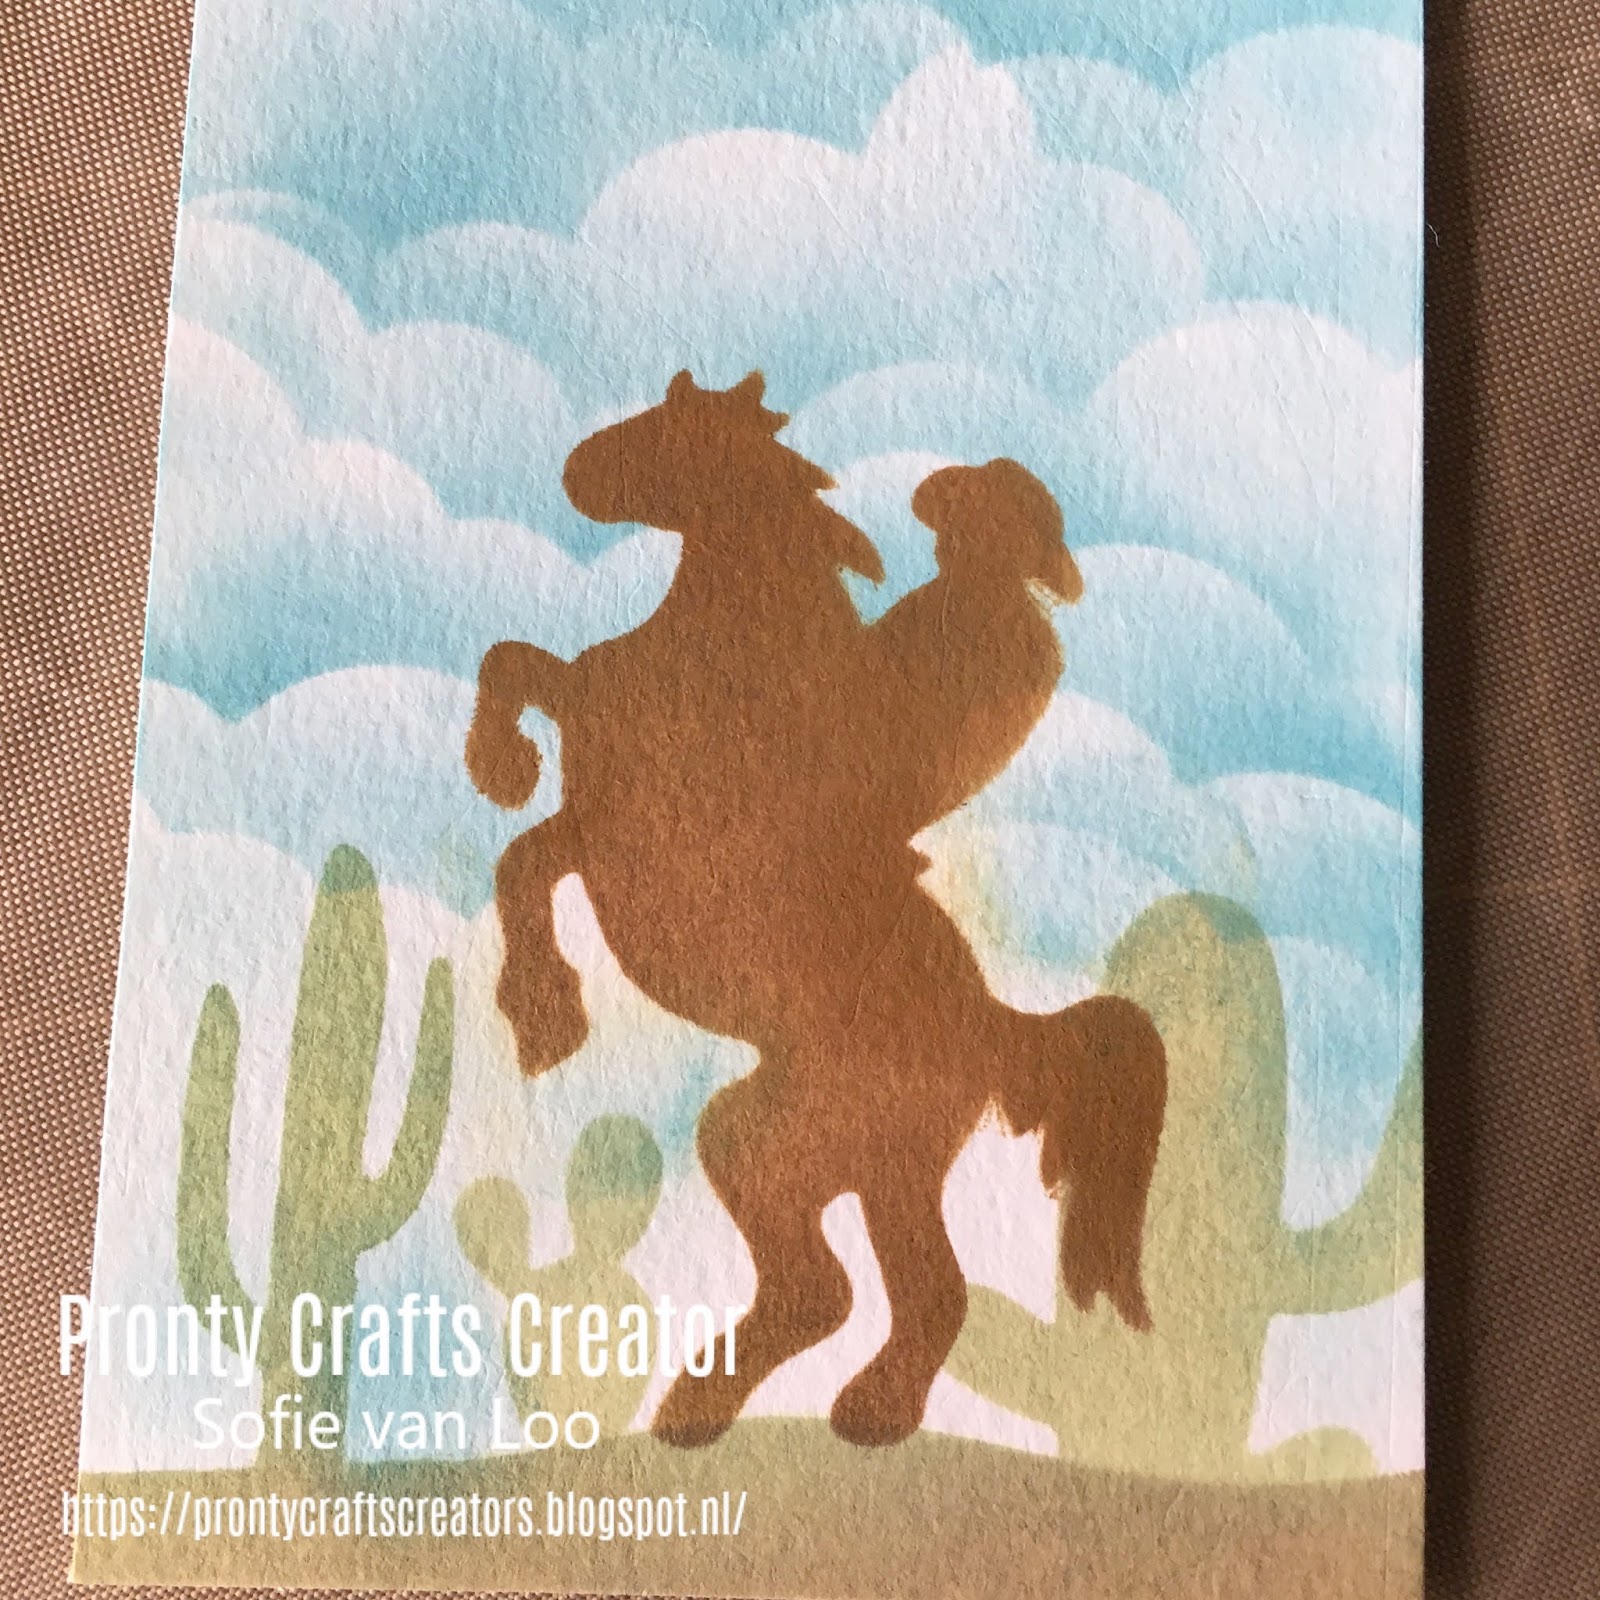
Het paard en ruiter heb ik met een bruin inktje gedaan, 
om vervolgens wat accenten aan te brengen met een zwarte fineliner.
Ik heb heel graag een randje rond mijn kaartjes, 
dus heb ik een messy rand getekend.


The horse and rider I blended using a brown ink.
And went around the image with a black fineliner.
I really like a border around my cards, so I've made a messy border 


Daarna heb ik mijn Bullet Journal stencils boven gehaald (ik ben er helemaal gek van), en heb ik accenten aangebracht, en een tekstje.  Sterretjes met een gouden pen, en het eerste kaartje was klaar voor mij.
De volgende stencils heb ik gebruikt:
470.851.000 (alphabet)
470.851.002 (icons)


I used my Bullet Journal stencils (which I adore by the way), and made some stars using a gold pen, en a small text.
My first card was ready to go
I used the following stencils:
470.851.000 (alphabet)
470.851.002 (icons)


Op naar het volgende kaartje.  
Hier heb ik de Spirograph stencil (470.803.049) gebruikt 
met 2 kleurtjes inkt.

On to the next card
I used the Spirograph stencil (470.803.049)
and blended 2 colours of ink


Dit kaartje heb ik met de Bullet Journal stencils gedaan, 
ik vind het super leuk geworden
Ik heb de Banners (470.851.003) en Edges (470.851.004) stencils gebruikt.
Met dit kaartje heb ik een plek op mijn pagina 
om een beetje journaling te doen


I've made this card using the Bullet Journal stencils 
Banners (470.851.003) and the Edges (470.851.004).  
I really like how this turned out.  
With this card, I have a spot for some journaling on my page


Ik heb mijn foto's gemat op wit cardstock, nog wat extra randjes toegevoegd. 
 Het 3e kleine kaartje heb ik gemaakt met de Woman With Hat stencil (470.802.069), 
helaas was ik een beetje te ijverig en heb ik vergeten een foto te maken :-)

Ik heb het week nummer toegevoegd in kurk, 
zodat alle weken in mijn album hetzelfde zijn.

Hopelijk vinden jullie het een leuk idee, 
en gaan jullie zelf met de Bullet Journal stencils aan de slag, 
ze zijn voor zoveel verschillende zaken geschikt, 
ik vind ze echt superleuk.

I've matted my pictures on some white cardstock, and added a few more borders.
The 3rd small card I've made with the Woman with Hat stencil (470.802.069),
 but I was so focused on creating i've forgot to take a picture :-)

I've added my week number with a cork sticker . 
That way all my weeks in my album have the same look

I really hope you like this idea, 
and you get to work with the Bullet Journal Stencils, 
they are great for so many occasions.  
I really love them


Hier is alles gedecoreerd, en mijn journaling toegevoegd.
Wat embellishments, en stempels, en vind het resultaat zeker heel leuk.

Ik wil jullie nog een fijne dag wensen, 
laat zeker jullie stencil creaties zien in onze Facebook groep.  
Ik ben benieuwd hoe jullie de Bullet Journal stencils gebruiken.

I've added my journaling, added some embellishments, a few stamps, and I really like this page.

I want to wish you all a beautiful day,
show us all your creations using the stencils in our Facebook group,
I'm curious how you guys use the Bullet Journal stencils.


vrijdag 22 juni 2018

Friends


Hallo allemaal,

Friends het mooiste wat er is. Gelukkig ben ik gezegend met een aantal super vrienden en één hele speciale. Voor haar een boekje gemaakt met de geweldige stencils van Pronty en het mooie MDF-boekje.

_


Hello all,


Friends for live, that's amazing. Fortunately I have a few good friends and one special.  I made this book for her.  I have used the beautiful stencils of Pronty.


Onderstaande materialen zijn gebruikt:
 
Mask stencils van Pronty. Onder andere deze: 470.805.038
MDF boekje van Pronty: 460.400.160 ( different edges)
Witte Gesso en babydoekjes
Verf diverse kleuren. In het voorbeeld is gebruik gemaakt van Dyslusion
Diverse lintjes naar keuze
teksten zelf geprint
-

The materials below have been used:
Mask stencils from Pronty: among other things: 470.805.038
MDF-pocket from Pronty: 460.400.160 ( different edges)
White Gesso and babytowels
Paint in a few colors
Various ribbons of your choice
a few texts


Als eerste breng ik een dun laagje  witte Gesso aan op het MDF-boekje. Ik laat dit drogen aan de open lucht.

-

First I apply a thin layer of Gesso. Let it dry in the open air.


Vervolgens breng ik de kleuren verf aan. Ik meng ze voorzichtig, zodat de kleuren wel overlopen maar niet geheel in elkaar vermengen.

-
After that I apply the colors of paint. I mix them carefully.


 Ook dit laat ik eerst even drogen. Aansluitend start ik met het aanbrengen van diverse patronen. Ik gebruik maar heel weinig verf, zodat de verf niet onder de sjablonen door loopt.

-

I also let this dry first.  Then i start by applying various patterns. I use very little paint. The paint must not run under the templates.


Dit herhaal ik met diverse stencils, totdat ik tevreden ben met het resultaat.

-
I repeat this with various stencils, until I am satisfied.


Vervolgens ga ik accenten aanbrengen met een witte gel pen. Je kunt er natuurlijk ook voor kiezen om dit met zwart te doen. Dan springt het er nog duidelijker uit.
-

Then I'm going to apply accents with a withe gel pen. You can also do this with a black gel pen.


Daarna maak ik de MDF-plankjes met diverse lintjes aan elkaar.  En dan gaat het op pimpen starten met stempelafdrukjes. Ik knip er eerst diverse uit en leg dit op het boekje. Aansluitend ga ik de inkleuren. In dit project heb ik ervoor gekozen om te kleuren met de Copics.

-

Then I attach the MDF boards with variuos ribbons to each other. And than it goes on.... decorating with a lot of stamps. I colored the stamps with te copics.


Als laatste heb ik diverse teksten getypt en geprint. De accenten rondom de tekst heb ik ook gedoodled met een zwarte gelpen.

-
Finally, I typed and printed a few texts.


Heel veel creatieve groeten,

-

Lots of love,


woensdag 20 juni 2018

Think Happy Thoughts


Hallo allemaal,

Hello everyone,

De stencils van Pronty kun je ook heel goed gebruiken om een mooie rand te maken op de achtergrond voor je kaart. Vandaag laat ik jullie zien hoe ik dat doe.

The stencils from Pronty are beautiful to use for a nice border as background on your card.
Today I show you how I do that.


Wat heb je nodig:
- een aantal stencils naar keuze
(ik heb gekozen voor: Tropical leaves 470.801.051
                               Gel Flower 470.803.040)
- twee kleuren distress inkt
- distress tools
- aquarel papier
- waterpen
- tekststempel
-diverse stempels
-stempel inkt
-versamark
- zilveren embossingpoeder
-heattool
- bijpassend cardstock

What do you need:
- a few stencil you like
(I used: Tropical leaves 470.801.051
          Gel Flower 470.803.040)
- two colors distress ink
- distress tools
- waterbrush
- a quote stamp
- some stamps 
- watercolorpaper
- stamping ink
- versamark
- silver embossingpowder
-heatgun
- matching cardstock


Leg je stencil op het aquarelpapier.
Neem met een tooltje je eerste kleur inkt op en verdeel dat over het middelste gedeelte van de rand.
Zorg dat je stencil niet verschuift. Plak dit eventueel in het midden vast met een klein stukje tape.
Neem dan de tweede kleur inkt op met je tool en blend de buitenste rand.

Put your stencil on the watercolorpaper.
Take with your distress tool some ink en blend this smoothly over the middle part from the boarder.
Take care that your stencil is not moving. If you want, put a little piece of tape on the middel of your stencil at the back so it won't move.
Than take the second color and blend the outside of the stencil.


Dan ziet je achtergrond er zo uit.

This is the result.


Stans een cirkel uit aquarelpapier en bewerk die met de twee kleuren inkt die je ook gebruikt hebt voor de rand.
Leg dan je stencil erop, en blend met een tooltje over enkele gedeelten van het stencil.

Cut a circle out of watercolorpaper and bring with ink the same colors on it as on the boarder.
Than lay your stencil on it, and blend some parts.


Dan krijg je dit.

This is what you get at the end.


Stempel met een kleine ornament of bloemenstempel enkele afdrukken in de rand met een bijpassende kleur.

Stamp with a smal ornament stamp or flower over the boarder in a matching color.


Stempel je bloemen, blaadjes en vlinders met versamark op een stukje aquarelpapier en strooi er zilveren embossingpoeder over. Verhit met je heatgun.
Kleur daarna alles in.
Ik heb dat gedaan in dezelfde kleuren als de achtergrond.

Stamp your flowers, leaves and butterfly's with Versamark on watercolorpaper.
Sprinkle silver embossingpowder over it and heat it with the heatgun.
Color than everything with the same colors and a waterbrush.


Plaats je tekststempel en plak de bloemen, blaadjes en vlinders op zijn plek.

Stamp the quote on the circle. 
Stick everything on his place.


En zie hier het eindresultaat.
Veel plezier met het maken van jullie eigen creaties op deze manier.
Plaats ze ook in onze FB groep. We vinden het erg leuk om te zien wat jullie gemaakt hebben.

And see here the result.
I wish you all so much fun with your onw creations.
Pleace place your cards on our FaceBook Page. We love to see what you made.


donderdag 14 juni 2018

Enjoy life's moments

Hallo en welkom,

Het liefst werk ik met stencils, inkt, stempels en potloden. De tag van vandaag is met deze materialen gemaakt. Ik gebruik graag blauw- en groentinten, maar vandaag koos ik voor het vrouwelijke zachtroze met vanille.
-
Hello and welcome,

My favorite materials to create with are stencils, ink, stamps and pencils. Today's tag is made with these items. I love to use blue and green tones, but today I chose soft pink and vanilla.


Begin met het beïnkten van je stencil door rechtstreeks kleur aan te brengen met je inktpad. Gebruik verschillende kleuren.
-
Start with inking up you stencil by adding the ink straight from the ink pad. Use several colours.

Spray lichtjes met water en leg het stencil omgekeerd op je papier. Hoe meer water, hoe lichter je afdruk en hoe meer het onder je stencil uit loopt. Dep met een keukenpapiertje, neem het stencil af en droog je werk.
-
Spray lightly with water and put your stencil face down on your paper. The more water, the lighter the image will be and the more it will run from under the stencil. Dab with a paper towel, take off the stencil and  (let) dry.

Daarna stempel je je afbeelding(en) op de kaart, waar nodig maskeer je natuurlijk.
-
Stamp your image(s) onto your card, mask when necessary.

Spons met de kleuren die je met het stencil hebt gebruikt. Spons in een donkerder tint door verschillende stencils. Ga niet te veel over je afbeelding.
-
Sponge with the colours you used with your stencil. Sponge in a darker shade through various stencils. Avoid covering your image too much.

Kleur de afbeeldingen in. Ik gebruikte neocolour II en potloden.
-
Colour the images. I used neocoour II and pencils.

Spons Versamark door een stencil en emboss met goud voor wat chique details. Ik vergat foto's te maken tijdens dat proces, dus op deze foto zie je een soort reconstructie op de al ge-embosste kaart. Het goud zie je door het stencil links. 
-
Sponge Versamark through a stencil and emboss with gold. I forgot to take pictures, so I had to reconstruct the scene on the embossed card. You can see the gold embossing through the stencil on the left.

Voeg meer details toe: gouden spetters, een stippellijntje en tekst. Plak het geheel op een donkere kaart en klaar is je tag.
-
Add more details: gold splatters, a dashed border and some tekst. Adhere to a dark card and your tag is ready.


Stencils:
470.803.033 Feathered zentangle
470.803.046 Triptych A4
470.802.057 Haringbone A5

Lieve groetjes,
-
Kind regards,