Pagina's

Posts tonen met het label Elvira. Alle posts tonen

zaterdag 2 februari 2019

Stars

Hallo allemaal, 
Hello and welcome

Vandaag heb ik voor jullie een kleurige bladzijde uit mijn Art Journal.
Wat heb ik er allemaal voor gebruikt;
Stencil van Pronty Crafts met sterren 470.802.074
Foamstempels  Stars van  van Pronty Crafts 3x) 494001.013
Acrylverf: rood – oranje – gee l- blauw – groen – wit -zwart
Structuurpasta van Dutch Doobadoo
palletmes
Posca verfstift wit
Zwarte stempelinkt


Today I have a colorful page from my Art Journal for you.
What have I used for it;
Stencil of Pronty Crafts with stars 470.802.074
Foam stamps Stars van from Pronty Crafts 3x) 494001.013
Acrylic paint: red - orange - yellow - blue - green - white - black
Structure paste from Dutch Doobadoo
pallet knife
Posca paint pen white
Black stamp ink


Dit is de stencils en de foamstempels.

This is the stencils and the foam stamps


Als eerste heb ik met een droge kwast de kleuren aangebracht.
Op een apart A-4tje heb ik de kwast ‘leeg’ gemaakt. Deze hebben we straks nog nodig.
Met de kleur wit heb ik wat lichte accenten aangebracht.

First I applied the colors with a dry brush.
On a separate A-4tje I made the brush 'empty'. We will need this one later.
With the color white I have applied some light accents.


Het stencil met sterren heb ik gebruikt om in de linkerbovenhoek accenten aan 
te brengen met structuurpasta gemengd met verf.
Rechtsonder heb ik alleen maar verf aangebracht met het stencil.

The stencil with stars I used to add accents in the top left corner with 
structure paste mixed with paint.
Bottom right I only applied paint with the stencil.

 
Met witte acrylverf en een paletmes heb ik streepjes aangebracht.
Vervolgens heb ik met de kleine ster van de set foamstempels hier en daar witte 
sterren op mijn bladzijde gestempeld.

I applied dashes with white acrylic paint and a palette knife.
Then I stamped white stars on my page here and there with 
the little star of the set of foam stamps.


Ik heb op karton de twee grootste sterren gestempeld en deze uitgeknipt.
Deze gebruik ik als mal. Met een zwart aquarelpotlood trek ik de omtrek van de sterren na.
Daarna stempel ik met zwarte inkt de sterren op het A -4tje waarop ik mijn penselen heb ‘droog gekwast’. Deze knip ik uit en plak ze op mijn art journal bladzijde. Met een waterkwastje maak ik de zwarte lijnen wat zachter .


 I stamped the two biggest stars on cardboard and cut them out.
I use this as a mold. I trace the circumference of the stars with a black watercolor pencil.
Then I stamp the stars on the A4 sheet with black ink on which I brushed my brushes. I cut this out and stick it on my art journal page. I make the black lines a bit softer with a waterwash.


Met verdunde zwarte en witte acrylverf en een spetterkwast maak ik spetters

Make splashes with diluted black and white acrylic paint and a splatter brush

 
Met een witte posca stift heb ik de tekst geschreven. De andere tekst heb ik op 
de pc gemaakt , uitgeprint en in stukjes opgeplakt. 

I wrote the text with a white posca marker. I have printed out the other text 
on the PC, and glued it into pieces.


Ik hoop dat ik jullie weer heb kunnen  inspireren. 
Ik wens jullie een sprankelende dag toe….

I hope that I have been able to inspire you again. 
I wish you a sparkling day ….


woensdag 2 januari 2019

Just Cool Dude!


Hallo lieve mensen,
Hello everyone ,

Allereerst de allerbeste wensen voor 2019! Dat het een mooi, creatief jaar mag worden voor jullie allemaal!!
First of all the best wishes for 2019! That it may be a beautiful, creative year for all of you !!

Vandaag heb ik een verjaardagskaartje met de lijn Pretty & Cool by Raffzz van Pronty Crafts voor jullie gemaakt . Ik heb deze gemaakt voor de 21e verjaardag van mijn zoon die in december jarig was.
Today I made a birthday card with the Pretty & Cool by Raffzz line from Pronty Crafts for you. I made this for the 21st birthday of my son, who celebrated his birthday in December.

Ik heb een Bendy-kaart gemaakt . Ik heb het patroontje van Internet. Soms is het wel eens fijn om even niet te hoeven denken, vooral in de drukke december maand, hoe je je kaartje gaat maken, maar gewoon even een patroontje volgen.  De achterkant van het kaartje kun je zo hoog maken als je zelf wilt. Vind ik zelf wel handig als je er veel op kwijt wilt. 
I have made a Bendy card. I have the pattern of the Internet. Sometimes it's nice to not have to think, especially in the busy December month, how to make your card, but just follow a pattern. The back of the card can be made as high as you want. I find it handy if you lose a lot on it


Wat je nodig hebt:
Set scrappapier 'Pretty & Cool' van Pronty Crafts 471.200.901
Bijbehorende stickervel 491.100.001
Zwart cardstock
Stansen
Distress inkt

What you need:
Set of scrap paper 'Pretty & Cool' by Pronty Crafts 471.200.901
Accompanying sticker sheet 491.100.001
Black cardstock
Die-cutting
Distress ink


Ik ben begonnen met het cardstock uit te snijden. De basis is 12 x 17 cm. De flapjes heb ik volgens patroon uitgesneden. Daarna heb ik de vouwlijnen gerild van de flapjes en deze  heb ik links en rechts aan de basiskaart geplakt. 
I started cutting out the cardstock. The base is 12 x 17 cm. I cut out the flap according to the pattern. Then I have the fold lines of the flap and I have these left and right to the base card pasted.


Vervolgens heb ik het designpapier uit gesneden. De randjes van het papier heb ik bewerkt met distressinkt ‘vintage photo’. Het designpapier heb ik op het cardstock geplakt. De flapjes rol ik om een petflesje om de ronding te krijgen.
Then I cut out the design paper. I have edited the edges of the paper with distress ink 'vintage photo'. I put the design paper on the cardstock. I roll the flap around a pet bottle to get the curve.


De basis van de kaart is nu al klaar. Ik heb de kaart versierd met snijmallen en de stickers die bij deze set Pretty &Cool horen. Met dubbelzijdig plakband ‘heb ik de flapjes in vorm’ geplakt.  

The basis of the card is already ready. I decorated the card with cutting templates and the stickers that belong to this set Pretty & Cool. With double-sided adhesive tape 'I glued the flap into shape'.


Zo zie je dat je toch relatief snel een aparte kaart kan maken. Er zijn een heleboel leuke kaartpatroontjes te vinden op Pintrest en de gave papierlijn van Pronty Crafts met bijbehorende embelishment zorgt ervoor dat je in korte tijd en tof kaartje kan maken. 

So you see that you can make a separate card relatively quickly. There are a lot of nice card patterns on Pintrest and the designpaper from Pronty Crafts with accompanying embelishment ensures that you can make a great card in a short time.


Ik wens jullie een creatieve dag toe. 
Tot een volgende keer !

I wish you a creative day.
See you next time !


zondag 2 december 2018

Kerststerren


Hallo allemaal, 
Hello everybody
Wat een verwennerij om een pakketje te krijgen met allemaal nieuwe spulletjes. Maar hoe moeilijk is het om te kiezen waar je mee gaat beginnen.
Ik heb gekozen voor de MDF-sterren. Deze zitten met zijn drieën in een pakket met een frame erbij.
Ik heb ze alle drie anders bewerkt zodat je kunt zien hoe veelzijdig de sterren zijn.

What a treat to get a package with all new stuff. But how difficult is it to choose where you are going to start.
I chose the MDF stars. These are all three in a package with a frame.
I have edited all three differently so that you can see how versatile the stars are.


Wat heb ik allemaal gebruikt:
460.400.180 MDF sterren van Pronty Crafts by Raffzz
470.802.074 Maskstencil met sterren
Zwarte gesso
Witte gesso
Oud boek
Extra Heavy gel medium
Distress paint in de kleuren..
Goud en bronzen wax
Goudkleurige pen
versamark 
embossingpoeder
heattool


En spulletjes om de sterren aan te kleden zoals stansjes houten ornamentjes, kleine piepschuim balletjes, sneeuwpasta, etc

What have I used:
460,400,180 MDF stars from Pronty Crafts by Raffzz
470.802.074 Mask stencil with stars
Black gesso
White gesso
Old book
Extra Heavy gel medium
Distress paint in the colors ..
Gold and bronze wax
Gold-colored pen
versamark
embossingpowder
heat tool
And stuff to dress the stars like  wooden ornaments, small polystyrene balls, snow paste, etc


Eerst heb ik de basis aangebracht.
Eén ster heb ik bewerkt met zwarte gesso . Het frame heb ik eerst bewerkt met het stencil 470.802.074 en structuurpasta en toen deze droog was heb ik deze  geverfd met zwarte gesso

First I applied the base.
I have edited one star with black gesso. I first edited the frame with the stencil 470.802.074 and structure paste and when it was dry I painted it with black gesso


Met een gouden stift heb ik het menu midden op de ster geschreven. Daarna heb ik het frame erop geplakt.
Voor de zwarte ster heb ik pasta en een plastic lepel en vork ook in de zwarte gesso gezet. Deze op ik willekeurig op het frame geplakt.
Met wax heb ik hier en daar accenten aangebracht en op het laatst een mooie gouden strik.
Zo creëer je een leuk, origineel menukaartje voor op de kersttafel.

With a golden marker I wrote the menu in the middle of the star. Then I stuck the frame on it.
For the black star I also put pasta and a plastic spoon and fork in the black gesso. These are stuck on the frame at random.
With wax I have here and there accented and at last a beautiful golden bow.
This way you create a nice original menu for the Christmas table.


Twee sterren heb ik bewerkt met witte gesso. Uit een uit boek heb ik stroken gescheurd en deze op de sterren geplakt het gel medium
Nadat deze helemaal droog was heb ik ze bewerkt met distress paint, de kleur antique linen. De kleuren weathered wood, vintage photo en walnut stain heb ik als tweede laag aangebracht en deze verdund met water zodat de kleuren mooi in elkaar overlopen.

I have edited two stars with white gesso. From a book I broke strips and stuck them on the stars the gel medium
After it was completely dry, I worked it with distress paint, the color antique linen. I applied the colors weathered wood, vintage photo and walnut stain as a second layer and diluted it with water so that the colors flow together nicely.


Op één ster heb ik, op een derde , samengebonden takjes opgeplakt met eronder verbandgaas.
De bomen en het hertje heb ik uitgestanst en bewerkt met witte embossing poeder van Ranger.
Ik heb nog een houten kerkje en sterretjes er opgeplakt Als afwerking heb ik hele kleine piepschuimballetjes aangebracht.
Dit idee heb ik uit een engels tijdschrift gehaald en mijn eigen touch eraan gegeven.

On one star I have, on a third, bonded twigs with gauze underneath.
I punched out the trees and the deer and processed them with white embossing powder from Ranger.
I still have a wooden church and stars stuck on it. As a finishing touch I applied very small polystyrene foam balls.
I took this idea from an English magazine and gave it my own touch.


De andere ster heb ik wat eenvoudiger gehouden. Ik heb mooie kerststerren, poinsettia,  uitgestanst en wat takjes. Deze heb ik bewerkt met distressinkt Antique linen. Ook de tekst heb ik uitgestanst en bewerkt. Dit heb ik op de bewerkte MDF ster geplakt.

The other star I kept some simpler. I have beautiful Christmas stars, poinsettias, punched out and some branches. I have edited these with distress ink Antique linen. I also punched out and edited the text. I stuck this on the edited MDF star.

Op het laatst heb ik een mooi organza lint erdoor geregen zodat het een hanger wordt. Deze kun je leuk als “kerstkaart” geven met de feestdagen.

In the end I put a nice organza ribbon through it so that it became a pendant. You can give this as a "Christmas card" with the holidays.


Ik hoop dat ik jullie weer wat inspiratie heb kunnen geven.  
Tot een volgende keer.

I hope that I have been able to give you some inspiration again.
See you next time.


vrijdag 2 november 2018

Storm

Hallo allemaal,
Op het moment dat ik dit blog voor jullie schrijf,
is het buiten echt van dat lekkere gure herfstweer.
Ik heb me daar ook door laten inspireren met het projectje wat ik voor jullie heb gemaakt.
 
 
Hello all, The moment I write this blog for you, is it really outside of that nice and bitter autumn weather. I also let myself be inspired by the project that I made for you.
 
Ik heb het volgende gebruikt:
Stencil van Pronty 470.803.036
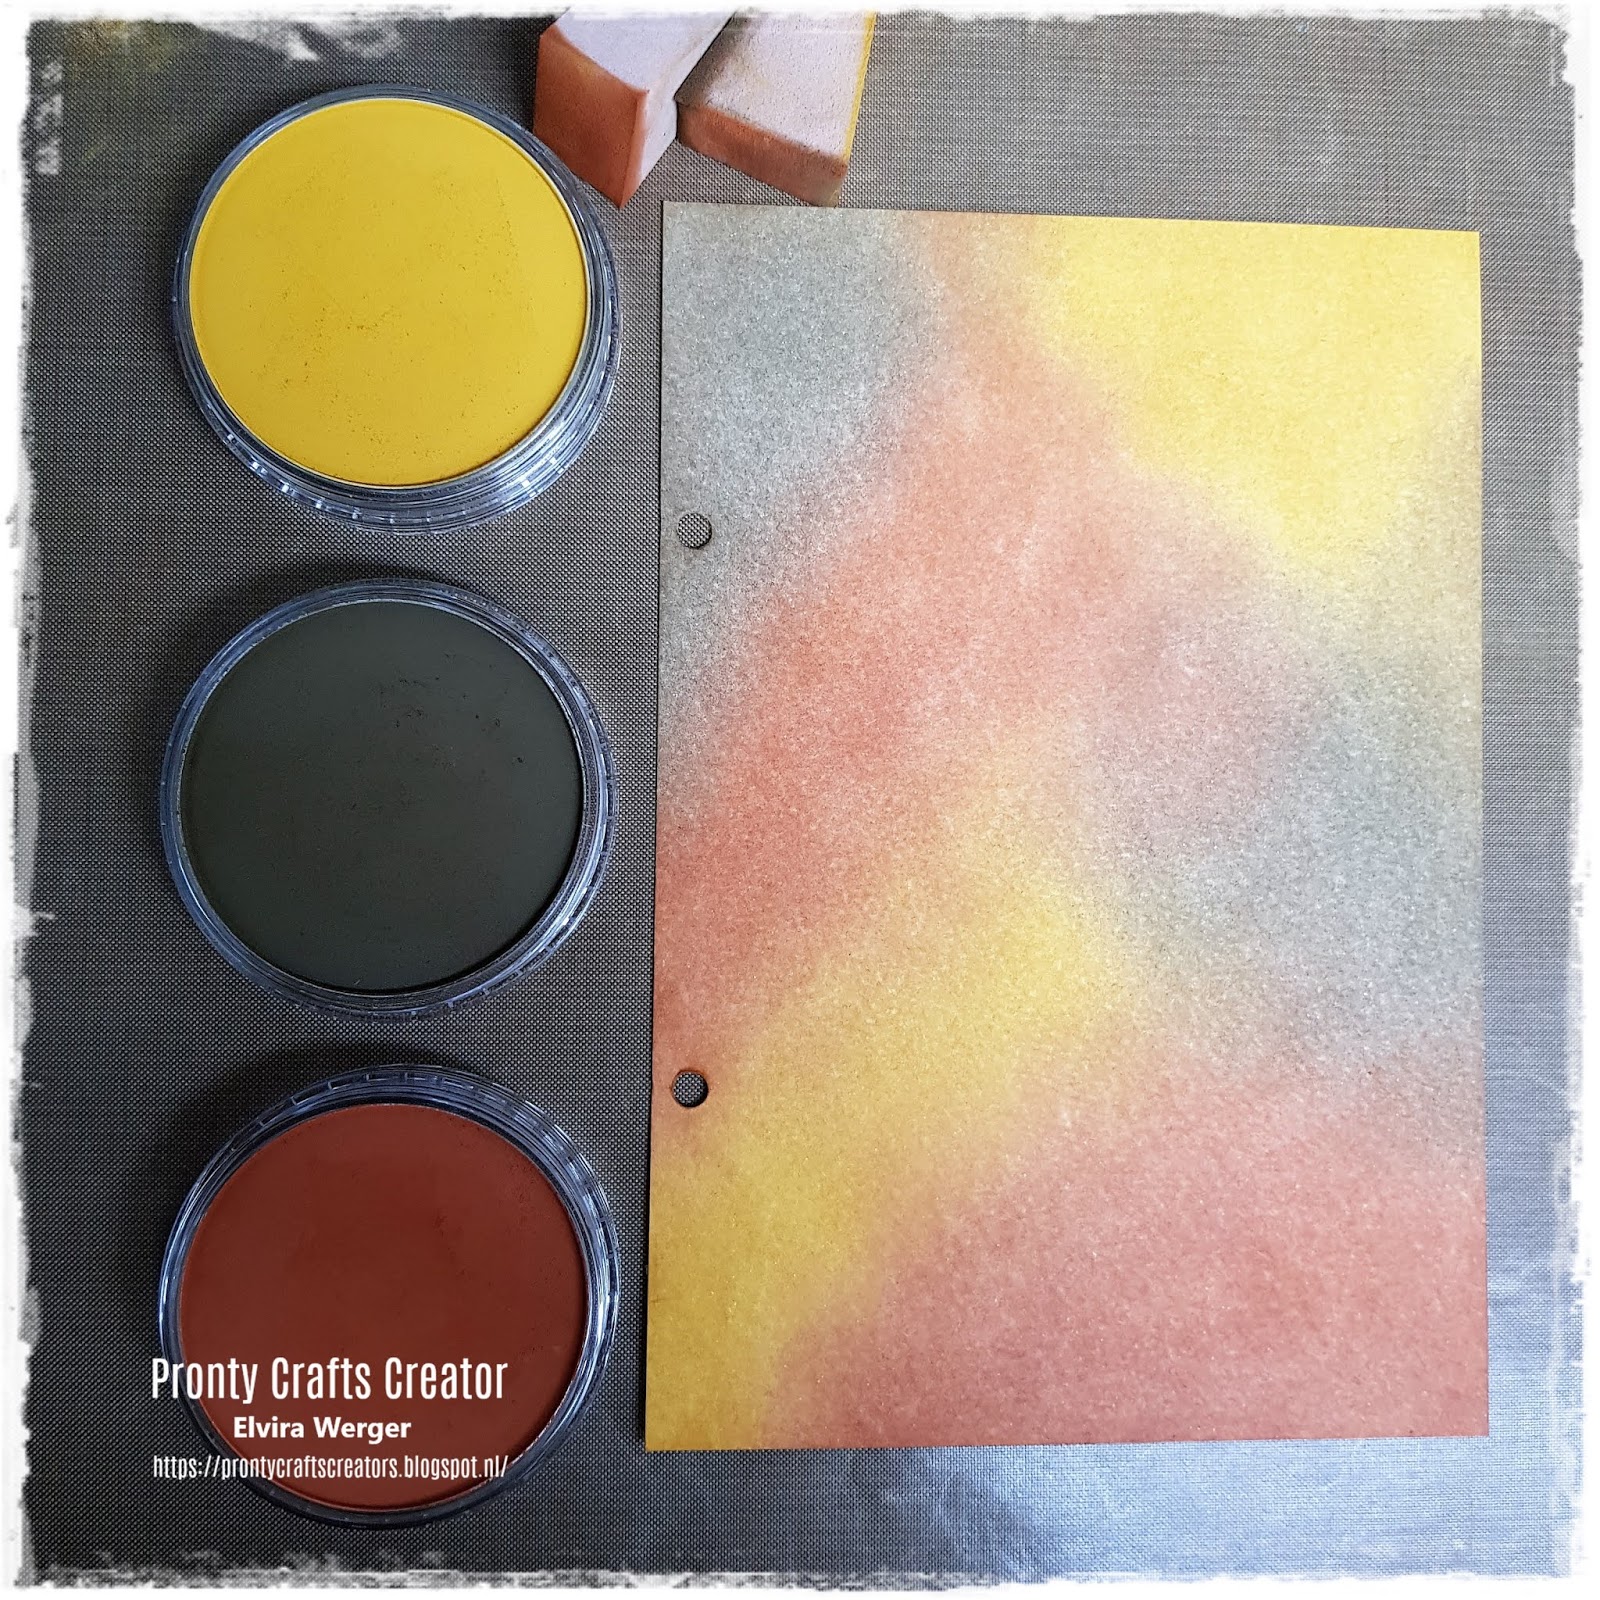
PanPastel; Raw Umber, Burnt Sienna, Yellow Ochre
Versamark
Gesso
Gelattos; caramel, Curcuma, Hazelnut, Iced Coffee
zwarte aquarelpotlood van Stabilo 
 
I have used the following: Stencil of Pronty 470.803.036 PanPastel; Raw Umber, Burnt Sienna, Yellow Ocher Versamark Gesso Gelattos; caramel, Curcuma, Hazelnut, Iced Coffee black watercolor pencil from Stabilo


Als eerste heb ik met drie kleuren PanPastel de basis opgezet.
Na elke laag PanPastel wat ik aanbreng, fixeer ik het papier met een fixeerspray.
 
First I have set up the basis with three colors PanPastel. After each layer of PanPastel I apply, I fix the paper with a fixer spray.
 
 
Onderstaande stencil heb ik gebruikt.
Kijk hoe makkelijk het is om de rondjes eruit te halen.
Verschillende motieven op een stencil, hoe leuk èn makkelijk is dat.
Ik schrijf ook altijd het nummer van de stencil op de stencil zelf,
super handig om de goede stencil terug te vinden. 
 
I used the stencil below. See how easy it is to take the circles out. Different motifs on a stencil, how nice and easy that is. I always write the number of the stencil on the stencil itself, super handy to find the good stencil.


 Een van de stukjes uit het stencil heb ik gebruikt om structuur op mijn project te zetten.
Je kunt met zo'n los stukje lekker over makkelijk bij.
 
I used one of the pieces from the stencil to put structure on my project. You can easily access it with such a loose piece.


Met versamark bewerk ik weer een ander stukje van de stencil op mijn achtergrond. Daar ga ik dan weer overheen met Panpastel. Zo krijg je een wat donkerdere afdruk.
 
With versamark I edit another piece of the stencil on my background. I'll go over there again with Panpastel. This way you get a somewhat darker print.
 
 
Ik stempel onderin een man met een paraplu. Deze stempel ik ook op een los papiertje .
Deze mask leg ik over mijn stempel heen en ik stempel meerdere keren de regendruppels.  
 
I stamp a man with an umbrella at the bottom. I also stamp this on a loose piece of paper. I put this mask over my stamp and I stamp the raindrops several times.
 
 
De dichte rondjes haal ik ook uit de stencil en teken ik willekeurig op mijn werk.
 
I also remove the closed circles from the stencil and draw them randomly at my work.
 
 
Eerst bewerk ik de rondjes met witte Gesso. Daarna breng ik laag voor laag verschillende kleuren gelatos op waarbij de laag steeds kleiner wordt.
 
First I edit the circles with white Gesso. Then I apply different colors of gelatos layer by layer, with the layer becoming smaller and smaller.


Als laatste zet ik rond de rondjes een zwarte lijn met een aquarelpotlood van Stabilo die ik daarna uitdoezel.
 
Finally, I put a black line around the circles with a watercolor pencil from Stabilo, which I then put out.
 
 
Daarna een leuke quote opgezocht en deze ook met PanPastel bewerkt en opgeplakt.
 
Then looked up a nice quote and also edited and pasted it with PanPastel.


Ik hoop dat ik jullie weer heb kunnen inspireren en graag tot een volgende keer
Een hele fijne dag gewenst.
 
I hope that I have been able to inspire you again and I hope to see you soon. Have a nice day.