Pagina's

Posts tonen met het label Marianne. Alle posts tonen

woensdag 20 juni 2018

Think Happy Thoughts


Hallo allemaal,

Hello everyone,

De stencils van Pronty kun je ook heel goed gebruiken om een mooie rand te maken op de achtergrond voor je kaart. Vandaag laat ik jullie zien hoe ik dat doe.

The stencils from Pronty are beautiful to use for a nice border as background on your card.
Today I show you how I do that.


Wat heb je nodig:
- een aantal stencils naar keuze
(ik heb gekozen voor: Tropical leaves 470.801.051
                               Gel Flower 470.803.040)
- twee kleuren distress inkt
- distress tools
- aquarel papier
- waterpen
- tekststempel
-diverse stempels
-stempel inkt
-versamark
- zilveren embossingpoeder
-heattool
- bijpassend cardstock

What do you need:
- a few stencil you like
(I used: Tropical leaves 470.801.051
          Gel Flower 470.803.040)
- two colors distress ink
- distress tools
- waterbrush
- a quote stamp
- some stamps 
- watercolorpaper
- stamping ink
- versamark
- silver embossingpowder
-heatgun
- matching cardstock


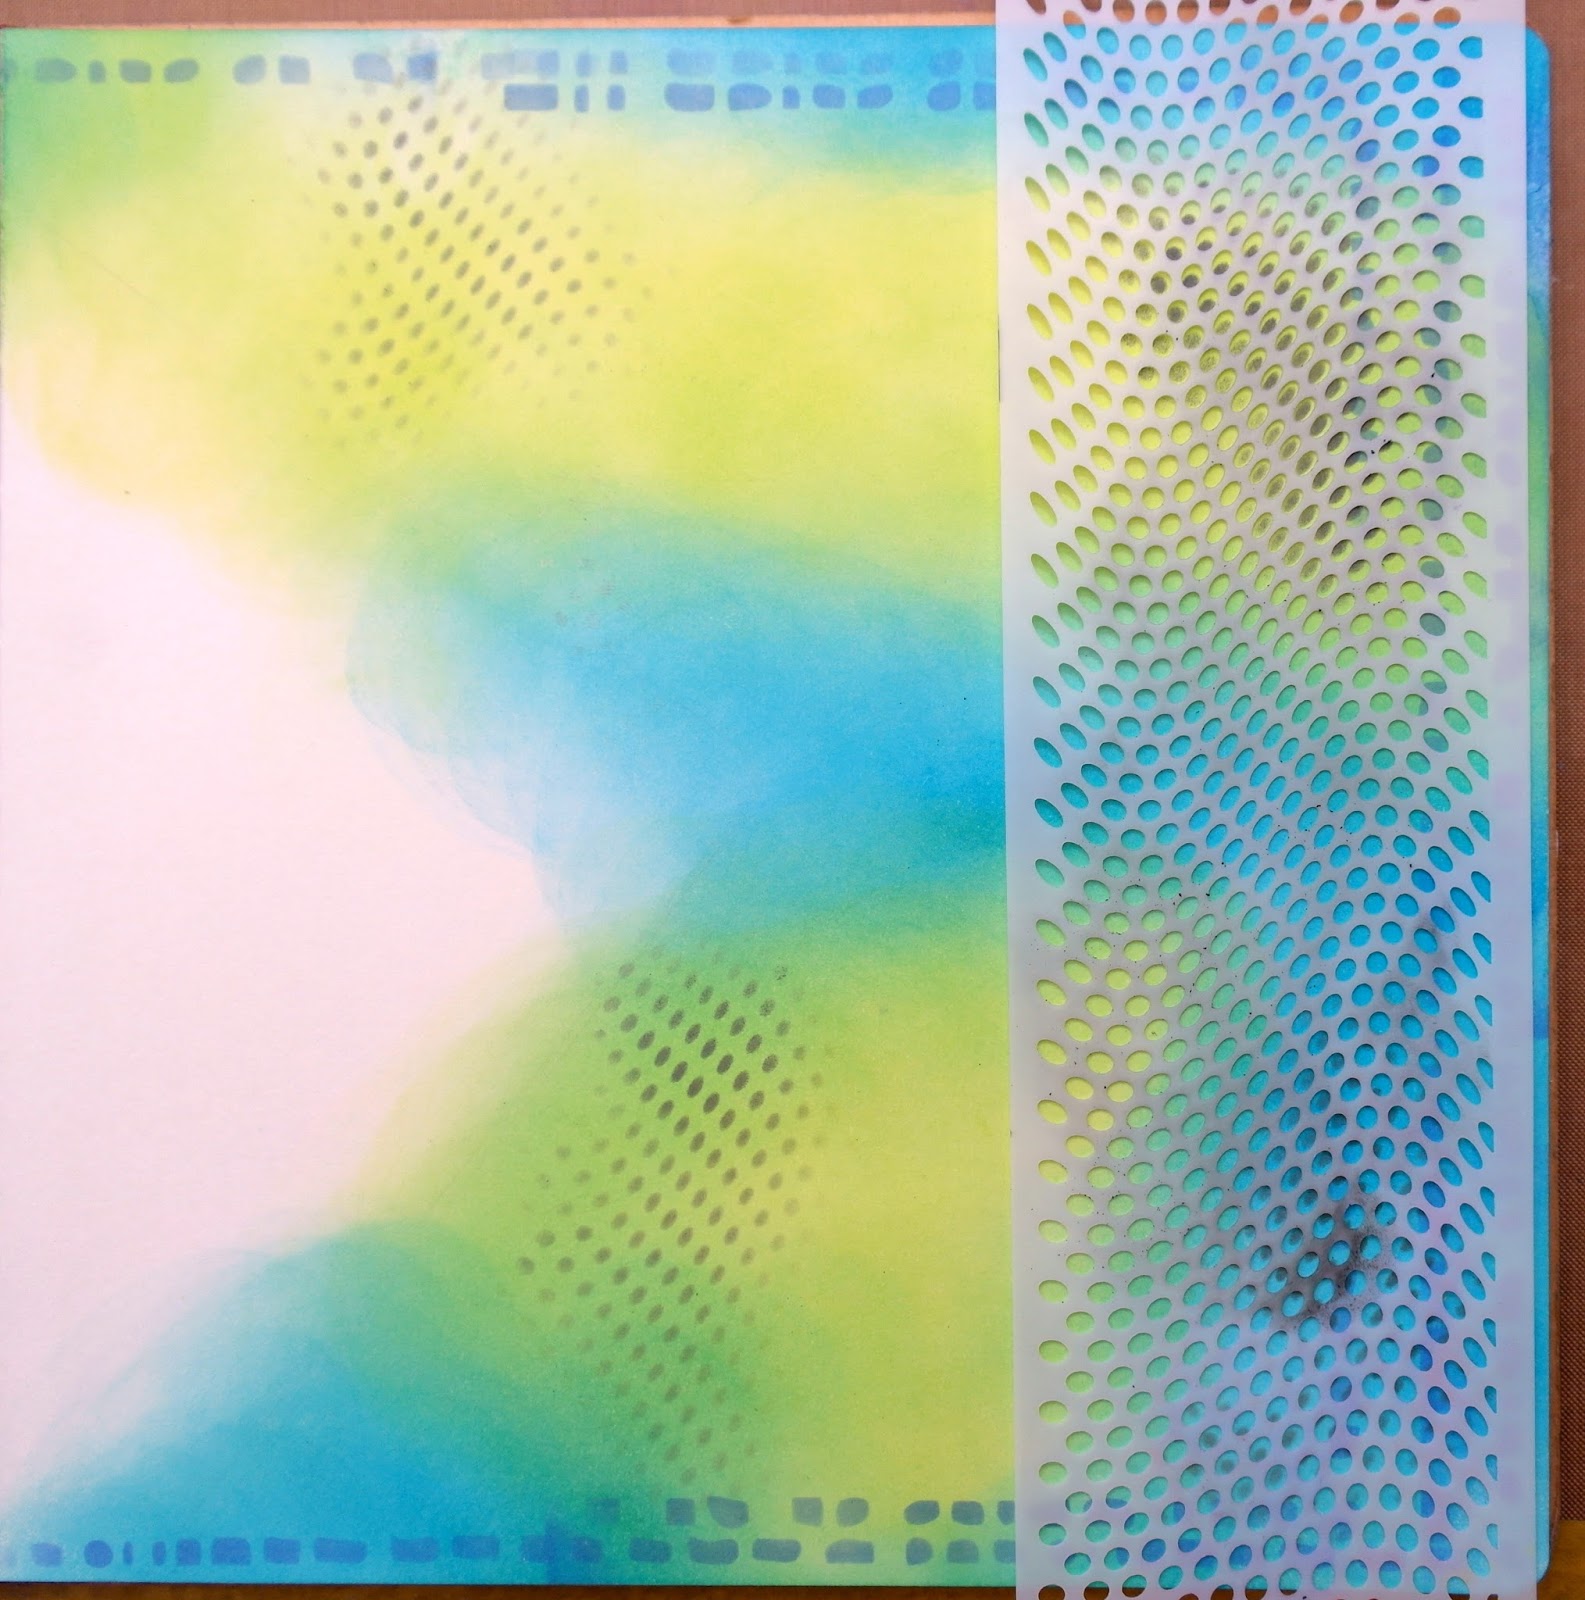
Leg je stencil op het aquarelpapier.
Neem met een tooltje je eerste kleur inkt op en verdeel dat over het middelste gedeelte van de rand.
Zorg dat je stencil niet verschuift. Plak dit eventueel in het midden vast met een klein stukje tape.
Neem dan de tweede kleur inkt op met je tool en blend de buitenste rand.

Put your stencil on the watercolorpaper.
Take with your distress tool some ink en blend this smoothly over the middle part from the boarder.
Take care that your stencil is not moving. If you want, put a little piece of tape on the middel of your stencil at the back so it won't move.
Than take the second color and blend the outside of the stencil.


Dan ziet je achtergrond er zo uit.

This is the result.


Stans een cirkel uit aquarelpapier en bewerk die met de twee kleuren inkt die je ook gebruikt hebt voor de rand.
Leg dan je stencil erop, en blend met een tooltje over enkele gedeelten van het stencil.

Cut a circle out of watercolorpaper and bring with ink the same colors on it as on the boarder.
Than lay your stencil on it, and blend some parts.


Dan krijg je dit.

This is what you get at the end.


Stempel met een kleine ornament of bloemenstempel enkele afdrukken in de rand met een bijpassende kleur.

Stamp with a smal ornament stamp or flower over the boarder in a matching color.


Stempel je bloemen, blaadjes en vlinders met versamark op een stukje aquarelpapier en strooi er zilveren embossingpoeder over. Verhit met je heatgun.
Kleur daarna alles in.
Ik heb dat gedaan in dezelfde kleuren als de achtergrond.

Stamp your flowers, leaves and butterfly's with Versamark on watercolorpaper.
Sprinkle silver embossingpowder over it and heat it with the heatgun.
Color than everything with the same colors and a waterbrush.


Plaats je tekststempel en plak de bloemen, blaadjes en vlinders op zijn plek.

Stamp the quote on the circle. 
Stick everything on his place.


En zie hier het eindresultaat.
Veel plezier met het maken van jullie eigen creaties op deze manier.
Plaats ze ook in onze FB groep. We vinden het erg leuk om te zien wat jullie gemaakt hebben.

And see here the result.
I wish you all so much fun with your onw creations.
Pleace place your cards on our FaceBook Page. We love to see what you made.


zondag 20 mei 2018

Pronty stencils op de GelliPlate.

Hallo allemaal,

Hello everyone

Pronty heeft veel stencils in het assortiment. Ik werk graag met een GelliPlate en stencils.
Vandaag laat ik jullie zien hoe ik dat doe.

Pronty has a lot of stencils in their product range. I love to work with a GelliPlate and stencils.
Today I want to show you how I do that.


 Wat heb je nodig:

What do you need:


Ronde GelliPlate
Brayer
Stempelinkt
kleurtje distressinkt
Aquarelpotlood
Stencil: Gel Flower 400.803.040
waterpenseel

Round GelliPlate
Brayer
Stampink
A color distressink
Watercolorpencil
Stencil: Gel Flower 400.803.040
Waterbrush


Leg je GelliPlate op een stempelblok. Doe je inkt erop en rol met je brayer tot je een egale kleur hebt gekregen

Put your Gelliplate on a acryllicblock.
Put your Ink on it and roll this out with the brayer until you have a smooth color.


Leg je stencil op je GelliPlate en rol nog een paar keer met je brayer over het stencil.
Haal je stencil eraf.

Lay the stencil on the GelliPlate and roll a softly a few times over the stencil.
Then take the stencil of.


Pak nu je dubbele kaart en leg die plat en helemaal open op je craftsheet. Neem een papiertje en dek het stuk af (achterkant van je kaart) waar je de afdruk niet wilt hebben. Ik druk namelijk niet het hele rondje af.

Now take your double card and lay him flat on the crafsheet. Take a paper and put that over the part where you don't want to have a print. This because I print this time only a part of the GelliPlate.


Dan ziet je afdruk er zo uit.

The print looks like this.


Met een aquarelpotlood in bijpassende kleur, maak ik hier en daar wat accenten. Die werk ik uit met een vochtige waterpenseel.

With a watercolorpencil in a matching color you bring some accents on the print. Work the color out with the waterbrush.


Nu kan je de stempels gaan plaatsen.

Now you can place your stamps.


En natuurlijk ook een tekst.
Je kaart is klaar.
Veel succes met het maken van jullie eigen creatie. Laat hem zien op Facebook. Dat vinden we erg leuk.

And of course a quote.
The card is finished.
Good luck with making your own creations. Please show them on our FaceBookPage. We like to see them.


dinsdag 10 april 2018

Be Yourself

Hallo bloglezers,

Hello everyone,

In deze post van mij laat ik jullie het gebruik van verschillende stencils zien op een pagina in mijn Art Journal.
Er valt heel wat te kiezen en op deze pagina heb ik 4 verschillende stencils gebruikt.

In this post of my, I show you several stencils on a page in my Art Journal.
There a lot to choose, but on this page I chose 4 different stencils.


Dit heb je nodig:
- een Art Journal
-distress  Oxide inkt
-distress tools
-een zwart en een wit Aquarelpotlood
-waterverf
-kwastje
-stempels
-stempelinkt
-babydoekje
-keukenrol
-acrylmarkers zwart, wit en groen
-Pronty stencils: Feathers 470.802.059
                                  Doodle Dots 470.802.058
                        Triptych 470.803.46
                                Gell Bubble 470.803.035

This is what you need:
- an Art Journal
-distress  Oxide inkt
-distress tools
- a black and a white watercolorpencil
-watercolor paint
-brush
-stamps
-ink to stamp
-babywipes
-kitchelpaper
-acrylmarkers black, white and green
-Pronty stencils: Feathers 470.802.059
                                  Doodle Dots 470.802.058
                        Triptych 470.803.46
                                Gell Bubble 470.803.035


Neem je Art Journal en een inlegvel. Snijd dat inlegvel schuin op maat en maak ook de vouw.
Leg dit vel in je AJ en teken de omtrek.

Take your Art Journal and an insert sheet. Cut the sheet slanting as you wish and make also the fold.
Put the sheet into the journal and draw the contour of it with a pencil.


Bewerk de achtergrond in de kleuren Distress Oxide die jij wilt.

Make the background with Distress Oxide into the colors you want.


Bewerk ook het inlegvel met Distress Oxide.

Do the same with the insert sheet.


Leg je stencil op je pagina. Neem een distresstool en maak de rand in de kleur van je keuze.
Doe dit rondom je pagina. Ik heb een tintje donkerder blauw genomen dan de achtergrond.

Lay the stencil on the page. Take a distress tool and make the border random. I took a touch darker than the color blue I used on the background.


Dit is dat het resultaat.

Here the result.


Leg het Tryptich stencil op je pagina en maak hier en daar een afdruk  met een distresstool met zwarte Distress Oxide.

Lay the Tryptich stencil on the page and take the distress tool with black Distress Oxide ink and go over some spaces of the stencil.


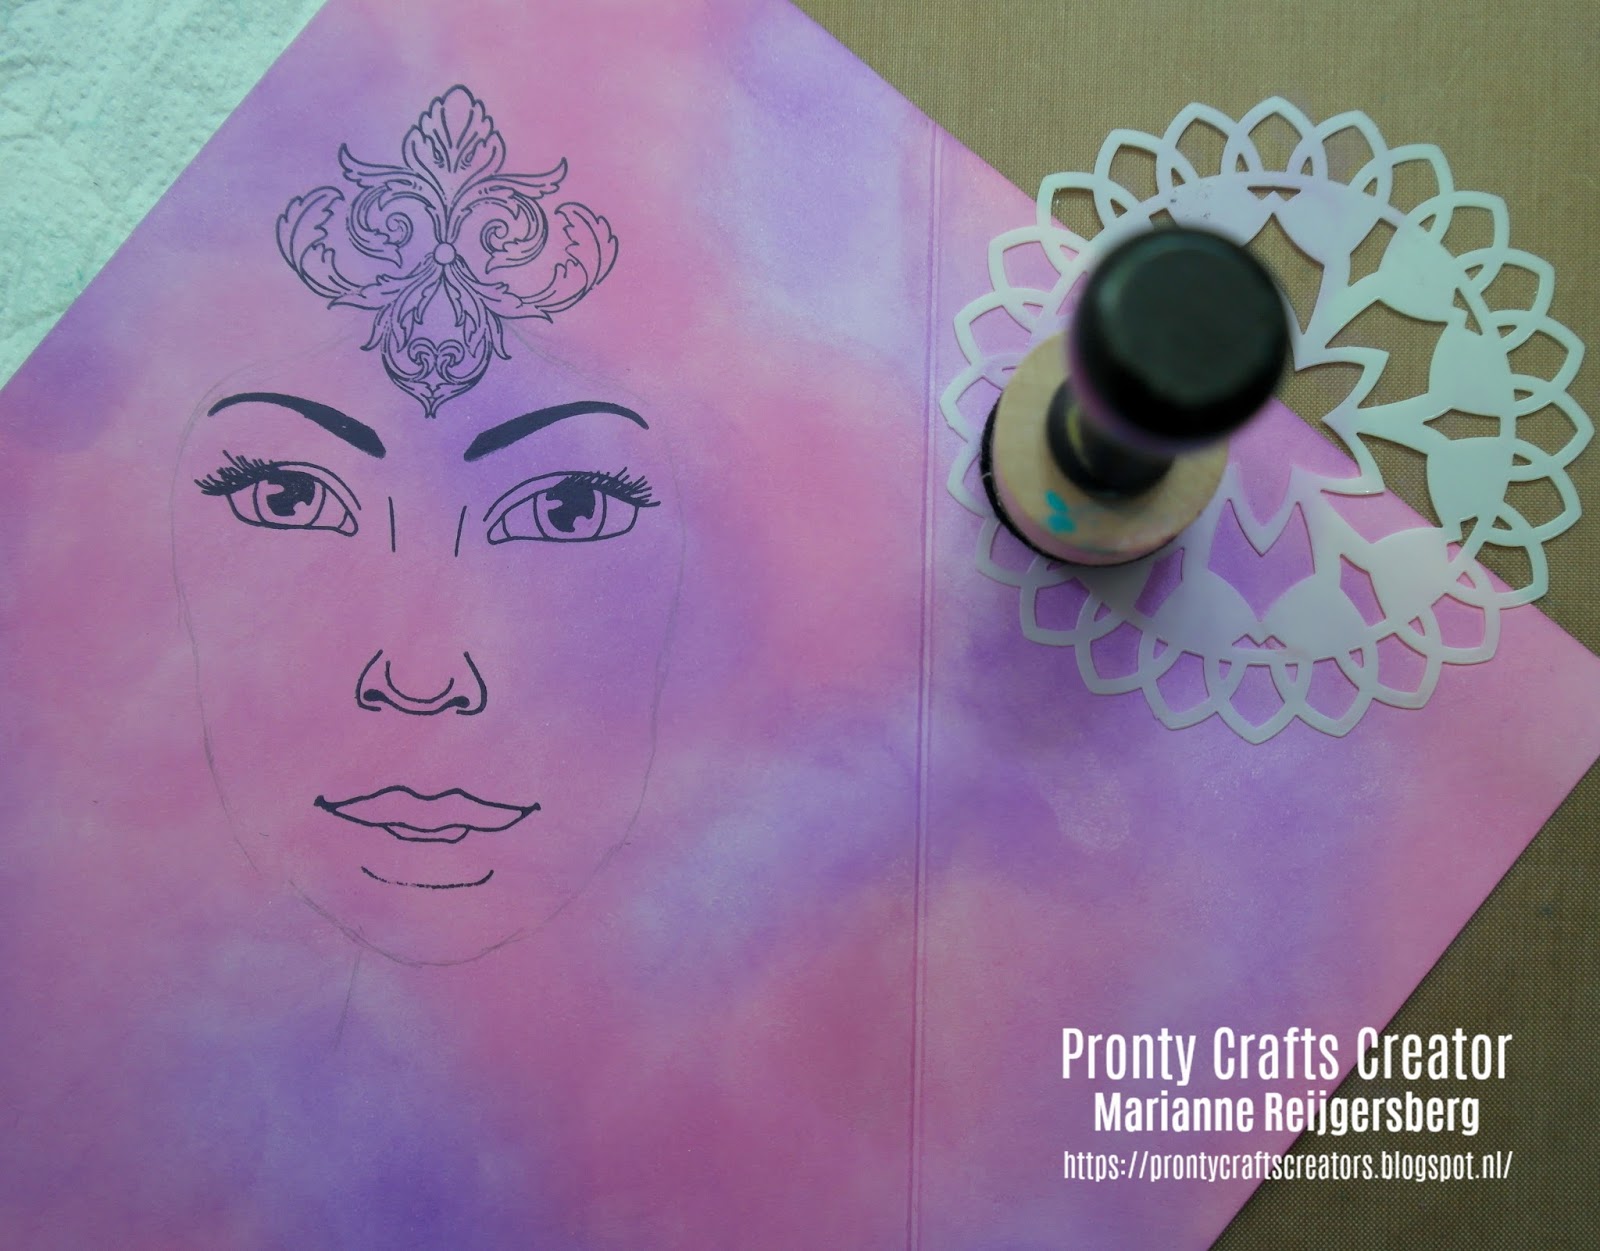
Begin aan het inlegvel.
Stempel de ogen, neus en mond. Ook de stempel die in het haar komt.
Teken met potlood heel licht de contouren van het gezicht.
Dan weet je waar je de stencils kunt plaatsen.
Leg de doily op het vel. 
Neem je donkerste kleur van de achtergrond en wrijf licht over het stencil.
Leg het stencil op een andere plek. Neem een babydoekje en wrijf weer zachtjes over het stencil. Je neemt de inkt nu weg.

Next work on the insert sheet.
Stamp the eyes, nose and mouth and also the stamp that comes into the hair.
Take a pencil and draw very light full the contour of the face.
So you know than where your have to lay your stencil.
Take the doily stencil and lay it on the paper.
Take the darkest color from the background on the distress tool and gently rub over the stencil.
Lay the stencil on an other place. Take a babywipe an rub also gently over the stencil. Now you take of the color from the background.


Maak de haren met het Feather stencil.
Neem een distress tool met zwarte Distress Oxide en ga daarmee over de veer.
Drapeer de veer meerdere malen langs het gezicht zodat er "haar" ontstaat.

Make hair with the feather stencil. Take the distress tool with black Distress Oxide and go over the feather. Drape the feather several times along the face. So you get the "hair".


Neem nu een zwart Aquarelpotlood en maak schaduw in het gezicht door heel licht wat kleur aan te brengen en dit uit te vegen met je vingers.

Take a black watercolor pencil and make some shadow into the face by  bringing lightly some color
round the eyes, nose and mouth. Also along the contour of the face.
Wipe out the color with your fingers.


Maak ook wat schaduw als nek. Kleur de ogen en mond met waterverf.
Gebruik naar wens een wit aquarelpotlood voor lichte schaduw. Zie mond.
Zet in de ogen met een witte acrylmarker witte stippen.

Make also some shadow round the neck. Color the eyes and mouth with watercolor.
Us as disired a white watercolor pencil voor light shadow. See the mouth.
Put a white dot into the eyes.


Kleur de stempel boven de ogen met waterverf en plaats de stempel.
Zet met paarse distressinkt en een stempel wat stippen op de achtergrond.

Color the stamp in the hair with watercolor and brush.
Put a fine dot stamp with purple inkt on some places of the paper.


Maak je pagina in je AF af door wat achtergrond stempels te plaatsen en wat blaadjes.
De blaadjes heb ik ingekleurd met een groene acrylmarker.

Finish the page by putting some background stamps and some branches with leaves.
I colored the leaves with a green acrylmarker.


Plak het inlegvel in je AJ. 
Stempel nog wat cirkels. Geef de cirkels schaduw met gelatos.

Glue the insert sheet on your Art Journal page.
Stamp some circles. Give the circles shadow with gelatos.


Dit is de linkerpagina.

This is the left page.


Dit is de rechterpagina.

This is the rightpage.


Hier de gehele pagina.
Ik hoop dat jullie wat nieuwe inspiratie hebben opgedaan.

Here is the whole page.
I hope I gave you some inspiration for your own pages.

Tot de volgende keer,

Kind regards,


-


zaterdag 10 maart 2018

Travel

Hallo allemaal,

Hi, everyone,

Vandaag ga ik jullie een bladzijde uit mijn Art journal laten zien, die ik gemaakt heb met de Gelliplate en stencils uit de Travel en Lama collectie.

Today I show you a page from my Art Journal. I made it with my GelliPlate and stencils from the Travel and Lama collection.


Wat heb je nodig:

-Gelliplate 6 inch
-distress Oxide inkt
-brayer
-stencils Pronty: stencils blue: Travel 470.529.010
                                                              Travel Quotes: 470.529.008
- stencil Pronty: World Map grahic 470.803.051
-stempelinkt
-panpastel
-Versamark
-zwarte verf of gesso

What do you need:

-Gelliplate 6 inch
-distress Oxide inkt
-brayer
-stencils Pronty: stencils blue: Travel 470.529.010
                                                              Travel Quotes: 470.529.008
- stencil Pronty: World Map grahic 470.803.051
-stempelinkt
-panpastel
-Versamark
-black paint or gesso


 Leg je Gelliplate op een acrylblok.
Doe er twee kleuren distress Oxide op en rol met de brayer tot je een mooie egale kleur hebt.

Lay your Gelliplate on a Acryllic block.
Put two colors distress Oxide on the plate and roll with your brayer until you have a smooth color.


Neem een achtergrondstempel en leg die op je Gelliplate.
Druk zachtjes met je vingers de stempel overal aan en haal hem er dan af.

Take your background stamp and lay him on the plate.
Press lightly with your fingers on te stamp  and take it of.


Dat is dit het resultaat.

Then this is the result.


Leg het stencil World Map Grahic op je afdruk en spons die met zwarte verf.
Doe dit alleen over het gedeelte waar je afdruk is.

Lay the stencil World Map Grahic on the print and take a sponge with black paint or black gesso en sponge over the holes.


Neem dan een kleurtje Panpastel en maak rondom op kleur met een ovale spons.

Now take your Panpastel en color round the print with a sponge.


Neem het stencil Travel en spons er met een dauber Versamark over.
Haal je stencil eraf en veeg met ronde bewegingen met je sponsje met Panpastel erover.
Doe dit op alle vier de hoeken.

Take the stencil  Travel and a dauber with Versamark and sponge over the image.
Take of the stencil and go over the Versamark with your sponge with PanPastel.
Repeat that on all the corners.


Nu wel de hoeken fixeren, dan blijven de afbeelding mooi en kan je verder werken.

Spray Fixative over the edges.


Stempel langs de rand van je afdruk en plaats je stempels.
Leg dan het stencil Travel Quotes op je pagina. Plak je woorden vlakbij af met schilderstape. Dan is het makkelijker sponsen.
Doe hetzelfde bij de andere woorden.

Stamp round the GelliPlate print and place your other stamps.
Than take the stencil Travel Quotes and lay it on your page.
I put some tape on the word next to the words  I want to make black. That's make it easier. 
Do the same with the other words.


Ik hoop dat jullie er weer een idee bij hebben.
Tot de volgende keer.

I hope that you have a new idea for your own creations.
Hope to see you next time.

zaterdag 10 februari 2018

Travel Journey

Hallo allemaal,
Hello everyone,

wat leuk dat je een kijkje komt nemen op ons blog.
We proberen hier jullie inspiratie te geven, maar zeker ook uitleg over hoe wij creaties opbouwen en wat voor materiaal we gebruiken.

How lovely that you take time to have a look on our blog.
Everytime we try to give you inspiration and explanation about the creations and material we use.

Deze keer laat ik jullie een spread zien uit mijn Art Journal met het Thema Journey.
Hoe leuk kan je dit gebruiken voor op een foto album van een mooie reis die je hebt gemaakt.

This time I show you a spread in my Art Journal with the Theme Journey.
How nice to use on a journey album.


Aan de hand van foto's leg ik uit hoe ik dit gedaan heb.

On basis of the photo's I explain how I did this.

Wat heb je nodig.

What do you need

Een Art journal op een album of papier waar op je wilt gaan werken.
Verf of inkt voor je achtergrond
Pronty stencils:
World Map 470.802.070
Lama & Cactus 470.802.120
Flight Plan 470.801. 050
Topical Leaves 470.850.005
Washi-tape
Wat stempels (ik heb postzegelstempels gekozen)
Tekst Quotes
Acrylmarkers

An Art Journal, album or papier to work on.
Paint or ink for the background.
Pronty stencil:
World Map 470.802.070
Lama & Cactus 470.802.120
Flight Plan 470.801. 050
Topical Leaves 470.850.005
Washi tape
Stamps 
Quotes
 Acrylic Markers


Je begint met het maken van je achtergrond.
Ik heb dat met distress oxide gedaan, maar kan natuurlijk ook met verf of iets anders
In het midden een strook wasi tape geplakt.

Start by creating the background.
I did it with Distress Oxide, but you can also choose for something else.
I stuck washi tape in the middle.


Leg nu je stencil met World Map erop en spons deze met zwarte inkt.
Laat het drogen of gebruik de heattool.

Put your World Map stencil on the background and sponge this with black ink.
Let it dry or use a heattool.


In de linkerhoek heb ik een stencil van de Tropical Leaves gelegd en met een distresstool en distressoxide bewerkt.
Aan de bovenkant een andere uit deze serie gebruikt.

In the left corner I used the stencil Tropical Leaves and with a distress tool I applied Distress Oxide through the openings of the stencil
Above an onther stencil from this serie.


Nu het stencil Flight Plan erop gelegd en ook met zwarte verf en een sponsje gedaan.
Over het zwart heb ik wit gebruikt.

I stencilled trough the openings of the Flight Plan stencil with black paint. On the black images on the background I used white paint.


Rechtsonder heb ik het stencil Llama en Cactus gebruikt met Distress oxide.

On the right side I stencilled Llama and Cactus with Distress Oxide.


Bovenaan weer een ander stencil uit de Tropical Leaves serie.

On the top again an other stencil from the Tropical leaves-line. 


Bij het maken van de woorden op mijn spread heb ik uit voorzorg wat schilderstape geplakt op de randen van het stencil. De woorden zitten heel dicht op de rand en de kans dat je met sponsen ernaast gaat is groot en dan zou zonde zijn van de pagina.
Eventueel kan je het plaatje eronder ook afplakken.
Op de pagina ernaast heb ik hetzelfde gedaan.

As a precaution, I putted tape to the stencil edges, during the stencilling of the words. 
The words are close on the edges, the chance to go over the edges is great, that would be a shame.
 If you wish you can do the same with the image beneath.
Repeat on the next page.


Nu heb ik wat stempels gezet en met verschillende kleuren acrylmarkers omtrekken van de stencils bewerkt.

Thereafter I did some stamping and outlining from the stencils with Acrylic Markers. 


Ook de quotes geplakt en wat gedoodled op de woorden.
Langs de tekst heb ik met een zwart potlood randjes gemaakt en die met een vochtige penseel wat uitgevaagd.

I sticked the quotes on the pages.
I drew some black lines along the quotes and  wiped the lines out with a waterbrush.


En dit is dan het resultaat. Bewerk de randen van je pagina nog wat met distressinkt om het helemaal af te maken.

This is the result. Colour your edges of the pages with distress ink to finish.


Dit was mijn bijdrage voor nu,
graag tot een volgende keer.

This was my contribution for today,
hope to see you next time.